RV Planet | Grape Creek RV Park | San Angelo, Texas | Rv Parks

Top RV-Friendly Destinations for Your Next Family Road Trip

One of the best aspects of RV travel is the freedom to explore new places, from national parks to hidden gems off the beaten path. Whether you’re planning a quick weekend getaway or a month-long road trip, finding RV-friendly destinations is key to making your family trip a success. These destinations offer stunning natural beauty, ample amenities, and the kind of adventure your family will cherish. Here are some of the top RV-friendly destinations that are perfect for your next family road trip.
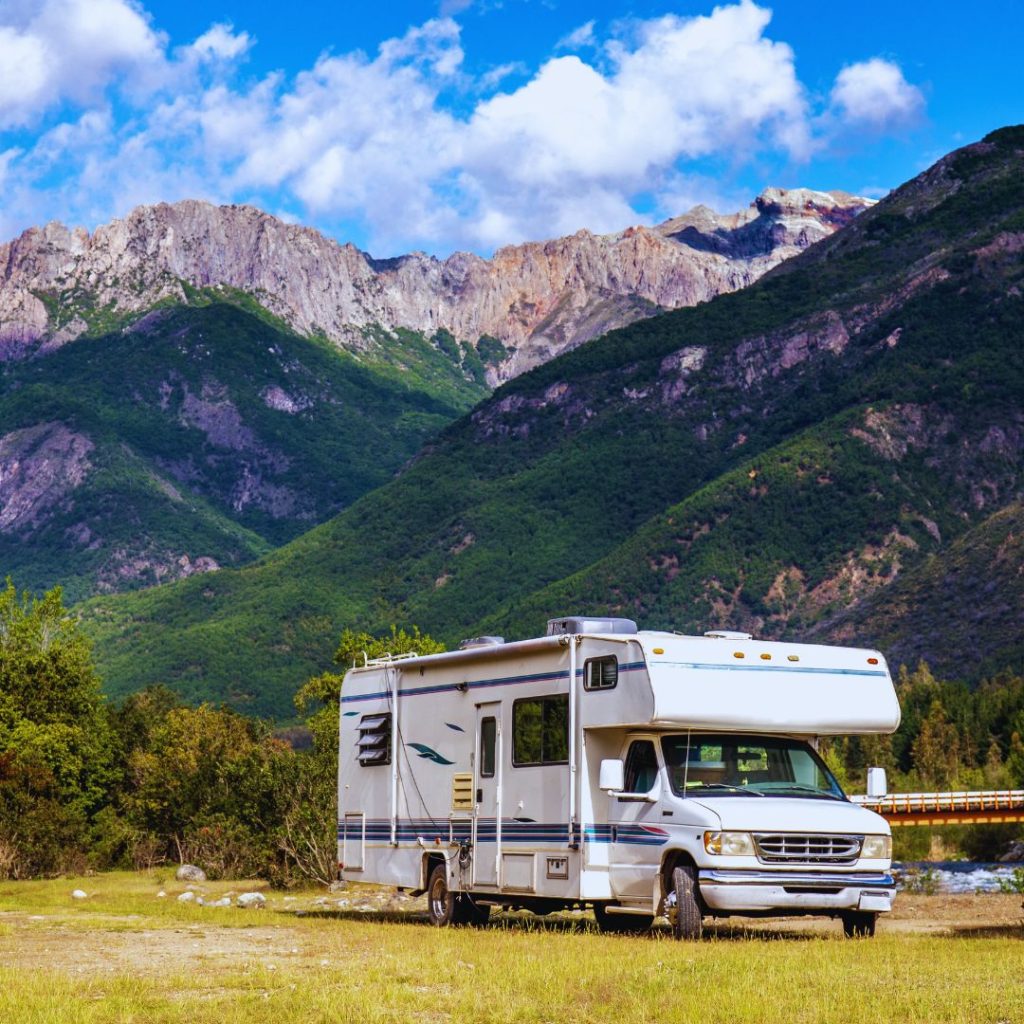
motorhome parked on the grass in front of mountains

1. Yellowstone National Park, Wyoming

Yellowstone is a bucket-list destination for RV travelers, offering diverse landscapes, wildlife, and a wide range of activities for the whole family. Known for its geothermal features, including the iconic Old Faithful, Yellowstone is full of natural wonders that will amaze your kids and provide plenty of opportunities for family bonding.

Why It’s Perfect for Families:
Yellowstone has several RV-friendly campgrounds with amenities like electrical hookups, water, and restrooms. You’ll be able to explore geysers, hot springs, and hiking trails, all while enjoying the comfort of your RV at night. Families can also spot wildlife like bison, elk, and even bears (from a safe distance). The park’s vastness means there’s something for everyone to enjoy, whether it’s fishing, hiking, or just relaxing by the campfire.


2. Acadia National Park, Maine

For families who love coastal beauty combined with mountain views, Acadia National Park in Maine is the perfect destination. With its rugged coastline, scenic drives, and accessible hiking trails, it’s a place where everyone can enjoy nature without feeling overwhelmed.

Why It’s Perfect for Families:
Acadia’s campgrounds are RV-friendly, and there are sites with full hookups as well as primitive camping options. The park offers a variety of activities such as cycling on the carriage roads, tidepooling at Bar Harbor, or enjoying the park’s many easy-to-moderate hikes with breathtaking views. With Acadia’s proximity to the charming town of Bar Harbor, families can also enjoy local shops, fresh seafood, and unique attractions.

autumn tree with a body of water in the distance and the sun setting on the left

3. The Great Smoky Mountains, Tennessee and North Carolina

Straddling the border of Tennessee and North Carolina, the Great Smoky Mountains National Park is one of the most visited national parks in the U.S., and for good reason. With its stunning mountain views, diverse wildlife, and ample family-friendly hiking options, it’s an ideal place to escape into nature.

Why It’s Perfect for Families:
The Great Smoky Mountains offers several campgrounds that can accommodate RVs, many with electric and water hookups. The park is home to beautiful hiking trails, ranging from easy walks to more challenging hikes for older kids. You can also explore Cades Cove, where you may spot wildlife like deer and black bears. Additionally, the nearby towns of Gatlinburg and Pigeon Forge offer family attractions like Dollywood and amusement parks, making it a perfect mix of outdoor adventure and entertainment.


4. Joshua Tree National Park, California

Joshua Tree National Park, located in Southern California, is a magical desert destination known for its otherworldly landscapes, giant boulders, and, of course, the iconic Joshua trees. This is a perfect destination for families who are looking to explore unique desert terrain while still having easy access to amenities.

Why It’s Perfect for Families:
The park has a number of campgrounds that accommodate RVs, including some with full hookups. Families can explore hiking trails, rock climbing areas, and star-gazing opportunities in the park. Kids will love seeing the park’s fascinating rock formations and unique desert flora. Don’t miss the Cholla Cactus Garden or a visit to the Barker Dam for a fun family adventure.

Joshua tree national park road during sunset with trees on either side

5. Grand Canyon National Park, Arizona

The Grand Canyon is a must-see for any traveler, and there’s no better way to experience it than with an RV. Known for its vast, breathtaking views, the Grand Canyon offers plenty of family-friendly activities that will keep everyone entertained.

Why It’s Perfect for Families:
Grand Canyon National Park has multiple campgrounds that can accommodate RVs, many with modern amenities like water and electric hookups. Families can enjoy a scenic drive along the canyon’s South Rim, visit the Yavapai Point for panoramic views, and take a ranger-led program to learn about the park’s history. Older kids might enjoy hiking down part of the South Kaibab Trail or taking a helicopter tour to see the canyon from above. Don’t forget to stop at the Grand Canyon Railway for a fun family outing.


6. Zion National Park, Utah

Zion National Park, with its towering sandstone cliffs, beautiful canyons, and rugged terrain, is another RV-friendly destination that’s perfect for families. Whether you’re looking for challenging hikes or more laid-back exploration, Zion offers something for everyone.

Why It’s Perfect for Families:
Zion’s South Campground offers RV-friendly sites, and the nearby Watchman Campground has sites with electrical hookups. Families can take part in easier hikes like the Riverside Walk or the Lower Emerald Pool Trail, or for more adventurous families, the Angels Landing hike offers breathtaking views (although it’s not for the faint of heart). Zion is also known for its stunning slot canyons, and there are plenty of opportunities to learn about the area’s geology and wildlife.


7. San Juan Islands, Washington

For families looking for a peaceful retreat in the Pacific Northwest, the San Juan Islands offer a combination of natural beauty, charming towns, and RV-friendly campgrounds. This island chain is perfect for families who enjoy water activities and laid-back exploration.

Why It’s Perfect for Families:
While the islands are typically accessed by ferry, there are campgrounds on Orcas Island and San Juan Island that accommodate RVs. Families can enjoy whale watching, kayaking, and exploring the quaint town of Friday Harbor. The islands are also home to a variety of parks and outdoor spaces, including Moran State Park on Orcas Island, which features beautiful hikes, lakes for fishing, and plenty of family-friendly activities.

lighthouse overlooking water on a rocky shore

Start Planning Your RV Adventure

The perfect family road trip starts with choosing the right destination, and these RV-friendly spots offer everything you need for a memorable adventure. Whether your family enjoys hiking in the mountains, exploring desert landscapes, or relaxing by the coast, there’s an RV destination that’s just right for you. So pack up the RV, hit the road, and create lasting memories with your loved ones in some of the most beautiful places in the U.S.

How to Choose the Right RV for Your Family

Choosing the right RV for your family can make or break your road trip experience. With so many options available, it’s important to find an RV that fits your family’s needs, budget, and travel style. Whether you’re planning a weekend getaway or a cross-country adventure, the right RV will ensure comfort, convenience, and fun for everyone. Here’s a guide to help you select the best RV for your family.
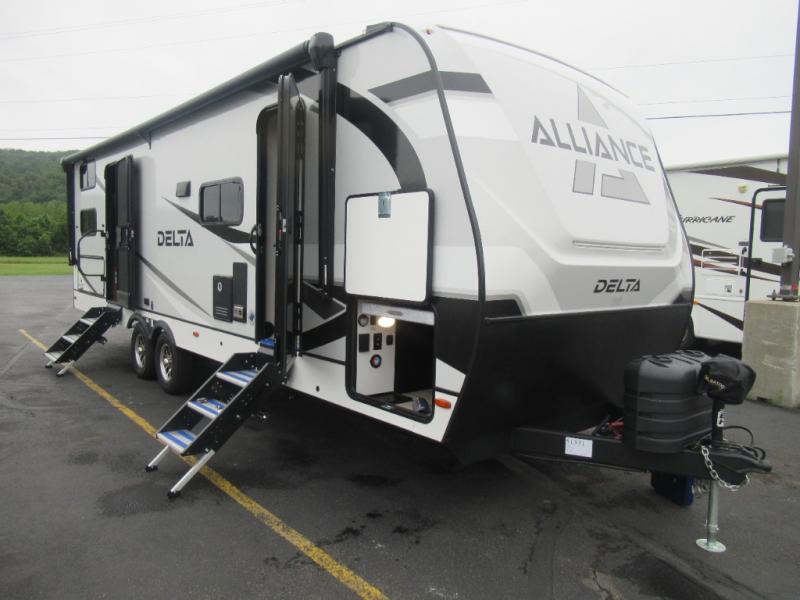
Alliance RV Delta 281BH Travel Trailer exterior view
Find your dream RV like this Alliance RV Delta 281BH Travel Trailer!

1. Consider the Size of Your Family

The first thing to consider when choosing an RV is the size of your family. You’ll need enough space for everyone to sleep comfortably, store their belongings, and move around without feeling cramped.

How Many People Will Be Traveling?
Consider how many people will typically be in the RV. Most RVs are designed for either two people or a larger family, but it’s important to ensure there are enough beds and seating for everyone. Some RVs have bunk beds, convertible sofas, and dinettes that can be turned into sleeping spaces, while others may have designated sleeping areas for each family member.
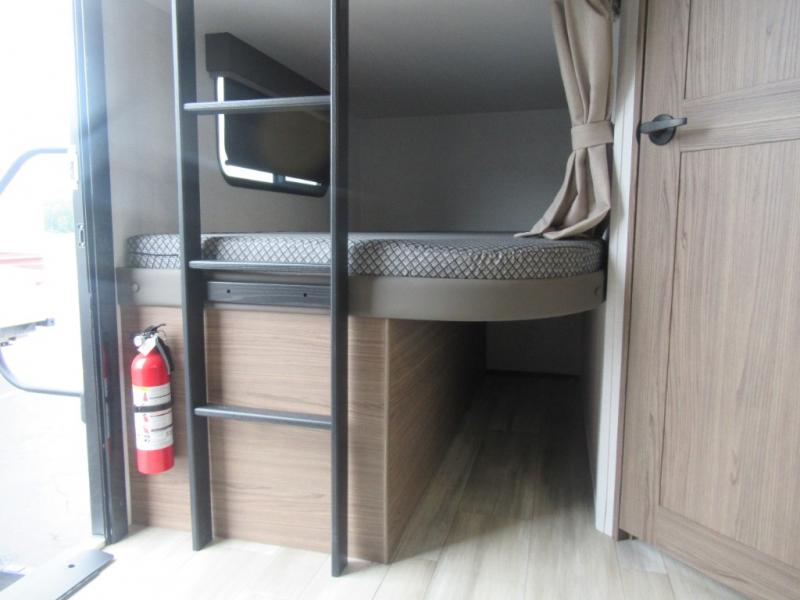
Alliance RV Delta 281BH Travel Trailer bunks with ladder and storage underneath
You’ll love these bunks in this Alliance RV Delta 281BH Travel Trailer.

Room for Everyone:
Look for an RV with adequate space to allow for privacy and relaxation. A model with a separate master bedroom or a motorhome with a slide-out can make a big difference in comfort.


2. Type of RV: Motorhome vs. Towable

There are two main types of RVs: motorhomes and towable RVs. Each offers its own set of benefits, so you’ll need to choose the one that fits your family’s travel style.
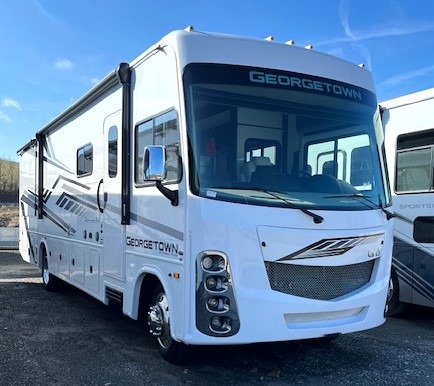
Forest River RV Georgetown 3 Series 32A3 Motor Home Class A exterior view

Motorhomes:
Motorhomes are all-in-one vehicles that combine both transportation and living space. These RVs are convenient for families who want to minimize the hassle of setting up camp or towing a trailer. They come in various sizes, from Class A (largest) to Class C (smaller and more compact). A motorhome can be ideal for families who want to quickly get on the road and enjoy the convenience of having everything in one vehicle.

Towable RVs (Travel Trailers and Fifth Wheels):
Towable RVs are hitched to your vehicle and can be detached when you arrive at your destination. If your family enjoys exploring with a separate vehicle once you’re set up, a towable RV could be a great choice. Trailers are easier to maneuver, and fifth-wheel RVs provide more space and luxury. However, towing a trailer requires a suitable vehicle with enough towing capacity.
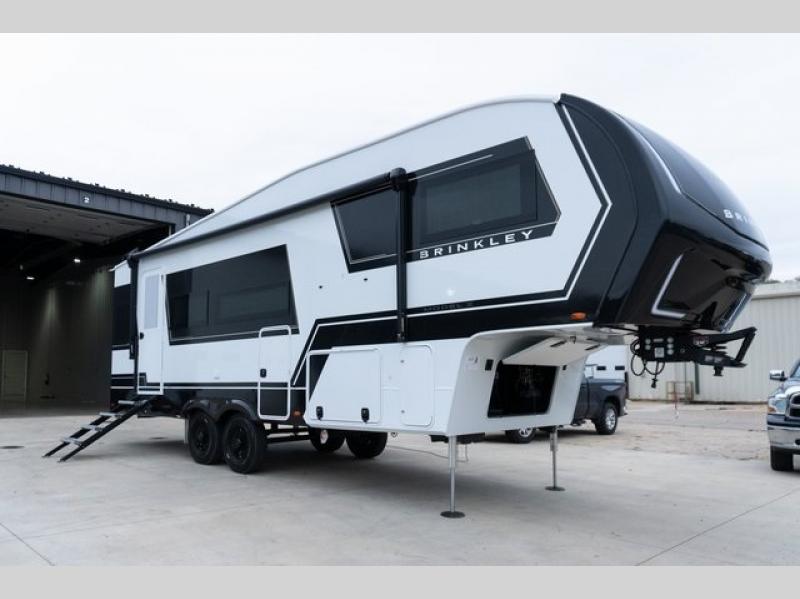
Brinkley Model Z 2670 Fifth Wheel exterior view
This Brinkley Model Z 2670 Fifth Wheel is great for luxury travel.

3. Sleeping Arrangements and Layout

Sleeping arrangements are one of the most important factors when choosing an RV for your family. You’ll want to make sure everyone has a comfortable place to sleep and that there’s enough room for everyone to rest after a long day of adventure.

Beds for Everyone:
Look for an RV with enough beds for each family member. Many family-friendly RVs offer bunk beds, fold-out sofas, or convertible dining areas. Some also have a master bedroom with a queen or king-size bed, and additional sleeping areas for kids or guests.
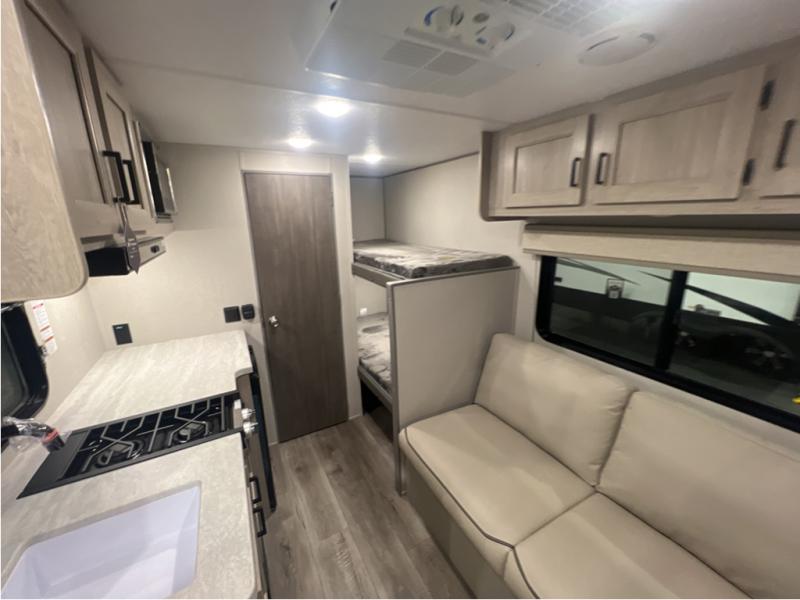
Coachmen RV Catalina 1648BHX Travel Trailer interior with bunks and sofa and kitchen
The bunks in this Coachmen RV Catalina 1648BHX Travel Trailer are great for the kids.

Layout Matters:
Consider the layout of the RV. Does it offer a good flow from the kitchen to the living area to the bathroom? Are there spaces where family members can relax or play games together? The best layouts maximize comfort while ensuring that the RV feels spacious, even when the whole family is inside.


4. Amenities and Features

The amenities you choose will greatly influence your family’s comfort during the trip. Depending on your family’s needs, look for RVs with features that make your travel experience smoother and more enjoyable.

Kitchen and Dining:
A well-equipped kitchen can save you money and make meal preparation easier, especially for families with dietary restrictions or picky eaters. Look for an RV with a full kitchen that includes a stove, microwave, refrigerator, and enough storage space for cooking utensils and supplies. Many RVs also have a dinette where the family can enjoy meals together.

Bathrooms:
Having a bathroom onboard is crucial for family comfort. Choose an RV with a bathroom that suits your family’s needs, whether it’s a full bath with a shower or a smaller half-bath. Some RVs even feature separate bathrooms for kids and adults.

Entertainment Options:
Long drives can get boring, especially for kids, so look for an RV with entertainment options like TVs, DVD players, and gaming systems. Many modern RVs have built-in entertainment systems that are perfect for keeping kids entertained during travel time.


5. Storage Space

Family trips often involve a lot of gear—clothes, camping equipment, toys, and other essentials. Ample storage space is a must when choosing the right RV.

Storage for Gear and Personal Items:
Look for an RV with plenty of cabinets, drawers, and closets for storing your family’s belongings. Many RVs also have exterior storage compartments that are perfect for larger items like bikes, camping chairs, or outdoor gear.

Organization:
Good storage not only provides space but also helps keep the RV organized. Consider adding extra organizational tools like bins or storage nets to maximize the space available.


6. Budget Considerations

The cost of an RV can vary greatly depending on its size, type, and features. It’s important to establish a budget before shopping to help you make the best decision for your family.
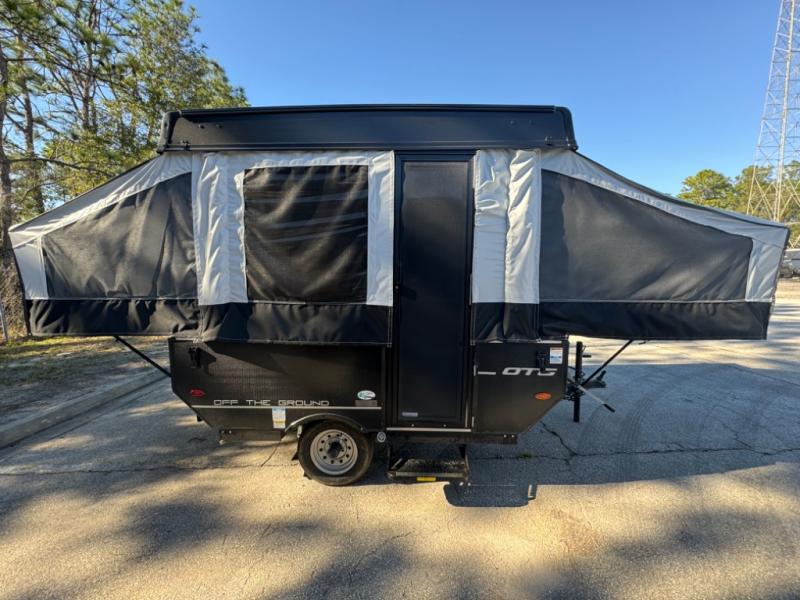
Forest River RV Rockwood OTG R16OTG Folding Pop-Up Camper exterior view with the tents extended
Save big on this Forest River RV Rockwood OTG R16OTG Folding Pop-Up Camper today!

New vs. Used RVs:
New RVs come with all the latest features and warranties, but they can be expensive. Used RVs are a more affordable option, though they may require more maintenance. Consider your budget and whether you’d prefer a new, high-tech RV or a used model that still fits your family’s needs.

Operating Costs:
Don’t forget to factor in additional costs like insurance, fuel, campground fees, and maintenance. Make sure you have a realistic understanding of the ongoing expenses involved in owning and operating an RV.


Choose Wisely for Maximum Enjoyment

Choosing the right RV for your family is an important decision that will shape your travel experiences for years to come. By considering your family size, travel style, budget, and needs, you can select an RV that offers comfort, convenience, and fun. Whether you opt for a motorhome or a towable RV, prioritize features that will enhance your family’s comfort and enjoyment on the road. With the right RV, your family can make the most of every trip and create memories that last a lifetime.

The Benefits of RV Travel for Solo Travelers

Traveling alone can be an incredibly rewarding experience, allowing you to explore new places, meet new people, and gain valuable personal insights. For solo travelers, RVing provides a unique way to explore the world while maintaining independence and comfort. Whether you’re looking for a peaceful escape or an adventurous road trip, RV travel offers numerous benefits for those traveling solo.

woman with a leather backpack sitting on a rock overlooking trees and water with her hands in the air

1. Flexibility and Freedom

One of the most appealing aspects of RV travel is the freedom it offers. As a solo traveler, you have complete control over your schedule and itinerary.

No Set Plans:
With an RV, you’re not confined to rigid schedules or hotel bookings. Want to stay longer at a stunning national park or take an unexpected detour to a quirky roadside attraction? You can.

Explore at Your Own Pace:
Whether you prefer leisurely days of sightseeing or the thrill of spontaneous exploration, RV travel lets you go at your own pace. You can sleep in, take a midday nap, or spend an entire day hiking or relaxing, all without worrying about meeting anyone else’s timeline.

This flexibility is perfect for solo travelers who may not want to rush or feel pressured to follow a group’s agenda.


2. Comfort and Safety

Traveling alone can sometimes feel daunting, but an RV provides both comfort and security, making it an ideal option for solo adventurers.

person with a blue backpack hiking through a misty forest

A Home on Wheels:
When traveling in an RV, you have all the comforts of home at your disposal—your own bed, bathroom, kitchen, and living space. This comfort allows for a more relaxed journey, especially when you’re far from home or camping in more remote areas.

Personal Safety:
RVing offers an added layer of safety compared to traditional solo travel methods like backpacking or staying in hostels. With your RV, you always have a safe space to return to, and it’s easier to lock up your belongings while you’re away exploring. Plus, RV parks and campgrounds are typically secure environments, providing peace of mind for solo travelers.


3. Social Opportunities

Though RVing is often associated with solitude, it also offers plenty of opportunities to meet like-minded travelers and connect with others.

Community of RVers:
Campgrounds, RV parks, and even national parks are filled with other travelers, making it easy to meet people along the way. Many RV parks have communal spaces, where you can join group activities, share tips with fellow travelers, or even enjoy campfire chats.

Group Meetups and Events:
If you enjoy socializing, there are often RVing-related events and meetups organized for solo travelers. These events provide a great opportunity to connect with others, share stories, and learn from experienced RVers.

Solo travel doesn’t mean being alone all the time. An RV allows you to enjoy time to yourself, while still being part of a larger community when you desire.


4. Financial Flexibility

Traveling solo can often be expensive, especially when you factor in accommodations, meals, and transportation. However, RV travel offers significant cost savings.

Save on Accommodation:
With an RV, you eliminate the need for hotel rooms or hostels, which can quickly add up, especially in popular tourist areas. Campgrounds and RV parks are typically more affordable than hotels, with many offering basic amenities at a fraction of the cost.

Self-Catering:
RV kitchens are fully equipped, which means you can cook your own meals and avoid expensive restaurants. Solo travelers can save a lot of money by preparing simple, healthy meals in their RV. Plus, having your own kitchen gives you more control over your food preferences and dietary needs.
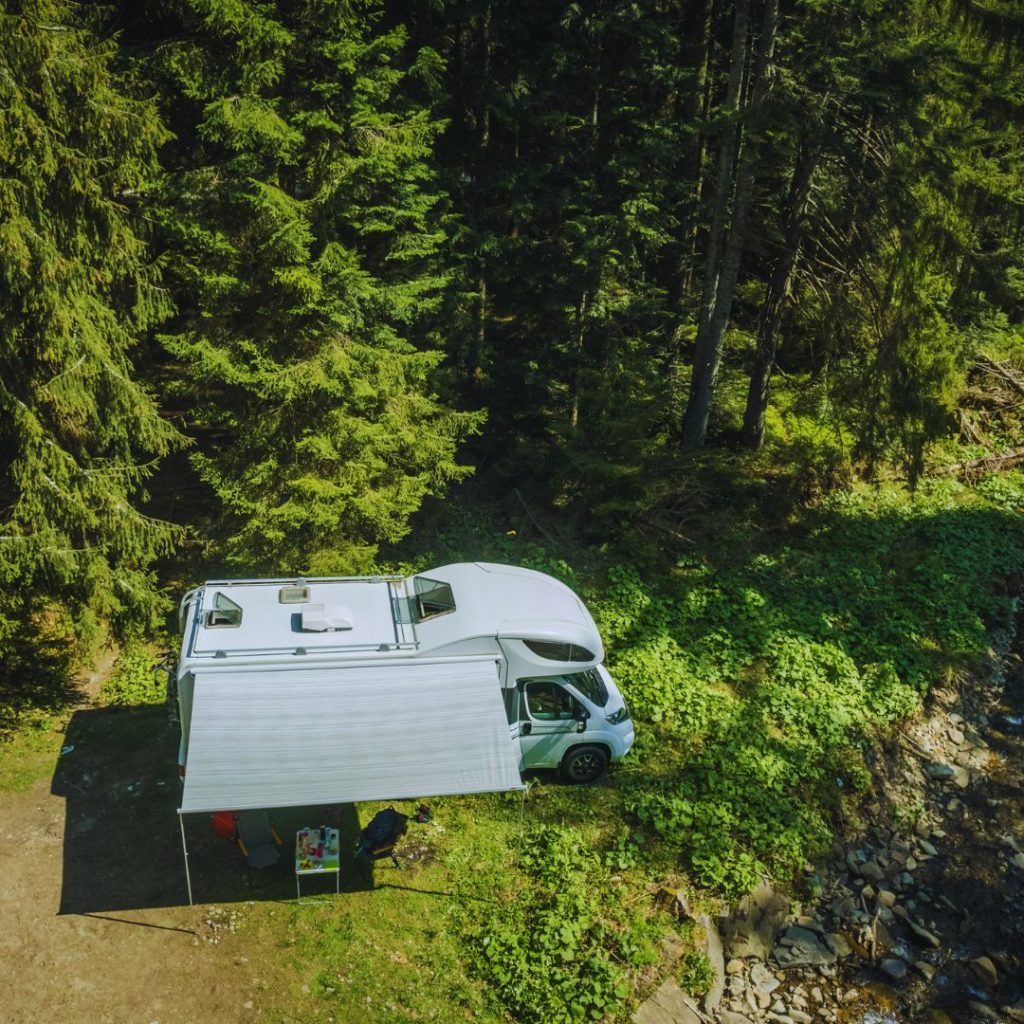
motorhome parked near a river with the awning out

5. Embrace the Outdoors

For solo travelers who love nature and outdoor activities, RVing is an excellent way to experience the great outdoors in comfort and style.

Access to National Parks and Wilderness Areas:
RVs allow you to camp and explore national parks, forests, and other outdoor destinations with ease. Whether you’re hiking, fishing, or simply soaking in the scenery, an RV provides a convenient base camp for all your outdoor adventures.

Minimal Setup Required:
With an RV, there’s no need to spend time setting up tents or worrying about sleeping arrangements. Simply park your RV, step outside, and immerse yourself in nature. The ease of setup means you can focus more on exploring and enjoying the great outdoors.


6. Solo Travel with a Personal Touch

As a solo traveler, you often have to make adjustments to your travel style to accommodate your individual needs. RVing makes this process seamless.

Customize Your Experience:
From choosing your routes to deciding on which campsites to visit, RV travel lets you completely customize your experience. Want to spend a week by the beach? You can. Prefer the solitude of a forested campground? That’s entirely up to you. RVs offer a level of personalization that other forms of travel simply cannot.


Conclusion: Your Adventure Awaits

For solo travelers, RVing offers the perfect balance of freedom, comfort, safety, and adventure. Whether you’re looking to embark on a cross-country road trip or spend a weekend in a nearby national park, traveling by RV allows you to explore at your own pace while providing a home-like atmosphere on the road.

With so many opportunities for personal growth, social interaction, and outdoor exploration, RVing is an ideal choice for those traveling alone. Ready to begin your solo RV adventure? Hit the road and create unforgettable memories along the way.

Essential RV Gear Every Traveler Needs

Whether you’re a seasoned RVer or new to the world of RV travel, having the right gear is crucial to making your journey comfortable and stress-free. The beauty of RV travel is that you can bring almost everything you need with you, but ensuring you’re properly equipped with the essentials will make your adventures more enjoyable. Here’s a list of must-have RV gear every traveler should have.

mother and four kids looking out over a valley at sunset

1. RV Leveling Blocks

One of the first things you’ll need to do when you park your RV is to level it. A stable RV ensures comfort and safety, especially when you’re using the kitchen, bathroom, or sleeping.

Why You Need Them:
Uneven ground can cause your RV to sway, making cooking and sleeping less enjoyable. Leveling blocks help you achieve the perfect balance quickly.

Recommended Gear:
Look for adjustable blocks that stack easily, such as the Camco Heavy Duty Leveling Blocks. These are durable, stackable, and designed to support the weight of your RV.

rv leveling block under a wheel

2. RV Sewer Hose Kit

Managing waste in your RV is essential, and you’ll need a high-quality sewer hose kit to safely empty your tanks when you’re at a campsite with full hookups.
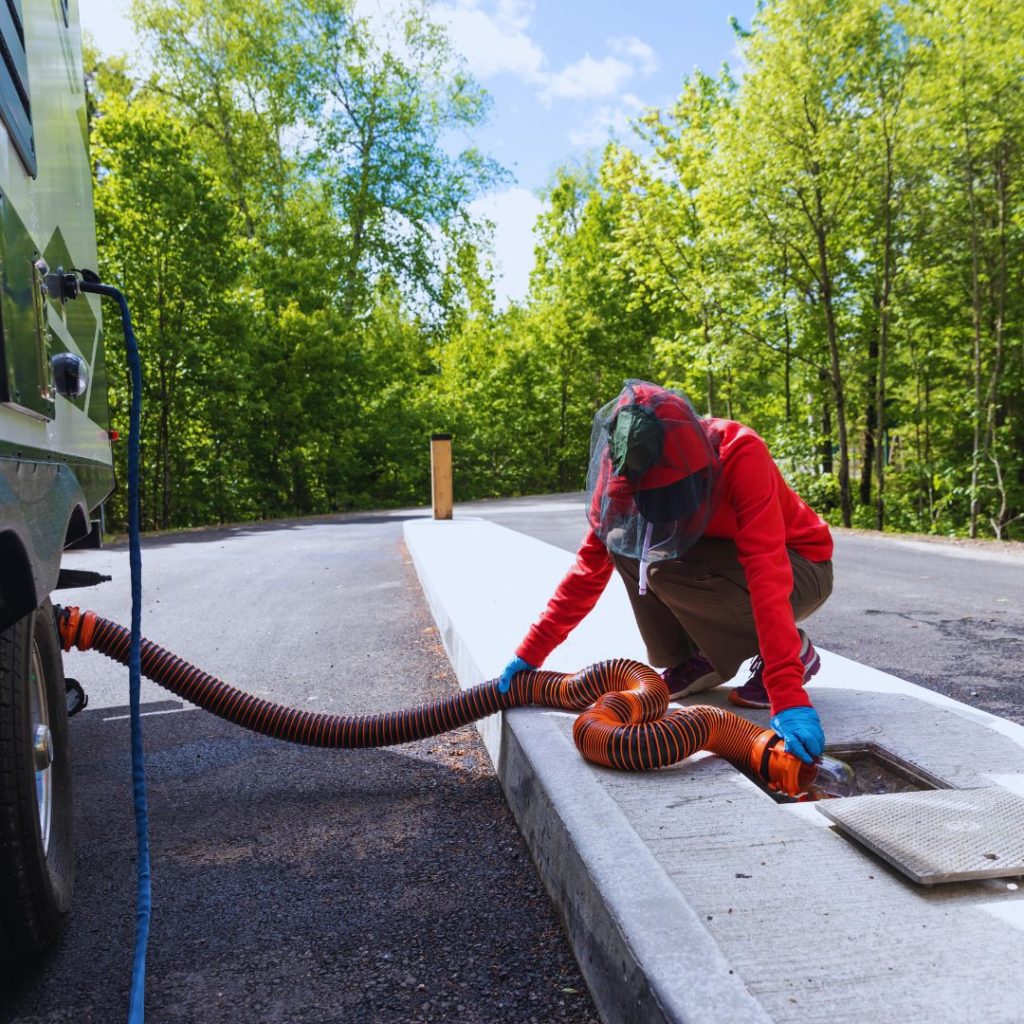
person in red directing an RV sewage hose to the dump site in the ground

Why You Need It:
A well-made hose ensures that waste is disposed of safely and efficiently, and a poorly maintained or cheap hose can cause leaks or spills.

Recommended Gear:
The RhinoFLEX 15-Foot Sewer Hose Kit by Camco is highly rated for its durability, ease of use, and included swivel fittings. Make sure to also have a sewer hose support to ensure a steady slope for proper drainage.


3. Portable Power Station

Running out of power on the road can be a real hassle, especially when you’re off the grid or camping in remote locations. A portable power station allows you to keep your devices charged and your essentials running.

Why You Need It:
Many modern RVs come with built-in power systems, but having a backup portable power station can save you in emergencies, or when you’re boondocking without electrical hookups.

Recommended Gear:
Consider a Goal Zero Yeti 500X Portable Power Station. It provides enough juice to power small appliances, lights, and electronics for hours, and it can be recharged via solar panels for added convenience during longer stays in nature.


4. Outdoor Rug

Setting up an outdoor living space makes a big difference in your RV experience, and a quality outdoor rug can enhance your campsite.

Why You Need It:
An outdoor rug offers a place to sit, relax, and even eat outside while keeping dirt and debris from being tracked into your RV. It also creates a more welcoming and comfortable space for you and your family to enjoy nature.

Recommended Gear:
The RecPro RV Outdoor Patio Rug is a popular option, offering durability and easy cleaning. Choose one with drainage holes to prevent water from collecting underneath, keeping the area dry and comfortable.


5. Tire Pressure Monitoring System (TPMS)

Keeping an eye on your RV’s tire pressure is essential for safety and optimal performance. A tire blowout can ruin a trip, so having a monitoring system will give you peace of mind.
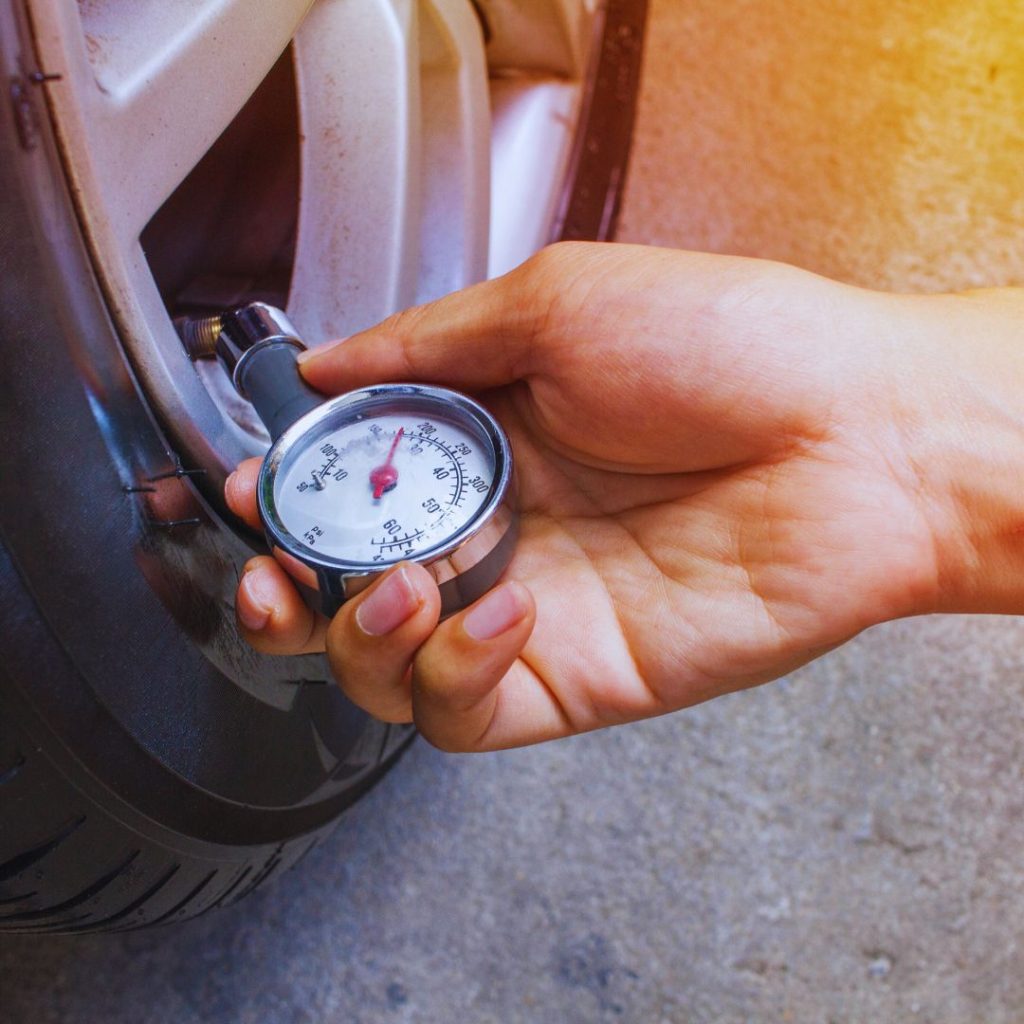
tire pressure gauge being used on the tire

Why You Need It:
Proper tire pressure not only extends the life of your tires but also improves fuel efficiency and handling. A TPMS allows you to monitor tire pressure and temperature while you’re on the road, providing early warnings before a problem arises.

Recommended Gear:
The TST 507 Tire Pressure Monitoring System is an excellent choice, offering real-time monitoring for up to 10 tires, with both visual and audible alerts when there’s an issue.


6. Hitch Lock

If you’re towing a trailer or fifth wheel, a hitch lock is an important security feature to protect your RV and your belongings.

Why You Need It:
Hitch locks prevent theft by securely locking the hitch and deterring thieves from taking your trailer when you’re not around.

Recommended Gear:
Look for a Master Lock 2866DAT Trailer Hitch Lock. It’s made of durable, weather-resistant materials and provides a solid deterrent against theft.


7. Camping Chairs and Table

Comfortable outdoor seating and a functional table will improve your camping experience, allowing you to enjoy meals or relax by the fire.

green camp chair set up with mountains in the distance

Why You Need Them:
While your RV may be cozy inside, the outdoors is where you’ll spend a lot of your time. A comfortable chair and a table for meals or games add a layer of comfort to your campsite setup.

Recommended Gear:
The GCI Outdoor Freestyle Rocker is a favorite for RV campers, offering a comfortable chair with sturdy support. Pair it with a Coleman Camping Table, which provides a stable surface for cooking, eating, or playing games.


8. Solar Panels

Solar panels are a game-changer for RVers who want to stay off the grid. They allow you to generate your own electricity, reducing the need for external power sources and enhancing your camping experience.

Why You Need Them:
Solar power is eco-friendly and can provide enough electricity to power lights, appliances, and devices without needing to rely on campground hookups.

Recommended Gear:
The Renogy 200-Watt Solar Panel Kit is a solid choice, offering easy installation and efficient power generation for most RVs.


Conclusion: Be Prepared for Any Adventure

Having the right RV gear can transform your travels from good to great. With essential tools like leveling blocks, a reliable sewer hose, and a portable power station, you’ll be prepared for anything the road throws your way. Whether you’re just starting out or are a seasoned RV traveler, investing in quality gear ensures your adventures are as comfortable, safe, and enjoyable as possible.

Ready to hit the road? Make sure your RV is properly equipped with these essentials and start planning your next adventure today! Get an amazing RV today!

Why RVing Is Perfect for Family Vacations

Family vacations are about creating lasting memories, exploring new places, and spending quality time together. While traditional travel methods like flights or hotels have their perks, RVing offers a unique and flexible experience that’s perfect for families. Here’s why more families are hitting the road in RVs for their next big adventure.
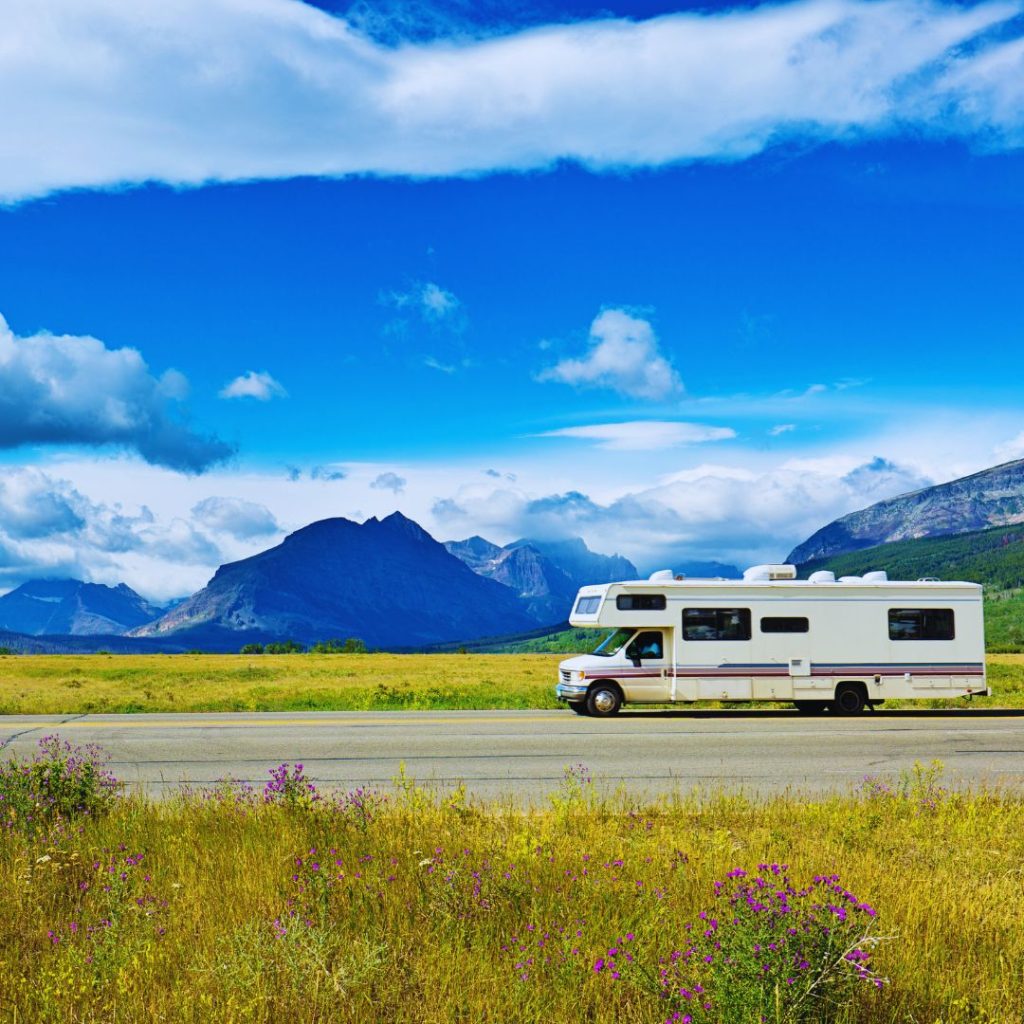
Motorhome parked on the side of the road between fields of grass and wildflowers with blue mountains in the distance

1. Freedom and Flexibility

RV travel offers unparalleled freedom to plan your trip your way.

Set Your Schedule: Unlike flights or cruises, you’re not tied to rigid timetables. Want to stay an extra day at the beach or make an impromptu stop at a roadside attraction? No problem.

Choose Your Destination: From national parks to theme parks, you can craft a vacation that suits your family’s interests. Whether you’re craving outdoor adventures or urban exploration, your RV can take you there.

This level of flexibility is ideal for families with kids, as it allows you to adapt to changing needs and interests.


2. Budget-Friendly Travel

Vacations can be expensive, but RVing offers significant savings compared to traditional travel.

No Expensive Flights or Hotels: Your RV is both your transportation and your accommodation. Campsite fees are typically much cheaper than hotel stays, and you can save even more by staying in free or low-cost boondocking locations.

Cook Your Own Meals: Eating out every day adds up quickly. With an RV kitchen, you can prepare healthy, affordable meals, which is especially helpful for families with picky eaters.

For larger families, the cost savings of RV travel can be substantial, making it a budget-friendly way to see the country.


3. Quality Family Time

One of the best aspects of RVing is the opportunity to reconnect with your loved ones.

Shared Experiences: From setting up camp to roasting marshmallows by the fire, RVing creates countless opportunities for bonding.

Disconnect from Screens: Many RV destinations, like national parks and remote campgrounds, encourage you to unplug and focus on spending time together. Hiking, fishing, or simply enjoying the scenery are great ways to create memories that will last a lifetime.

RV trips allow families to slow down and truly enjoy each other’s company in a way that other vacations often can’t.

family dressed in red with backpacks looking out across a valley

4. Adventure at Your Fingertips

RVs open the door to a world of adventure, especially for families who love the outdoors.

Explore National Parks: Visit iconic destinations like Yellowstone, Yosemite, or the Grand Canyon, where you can hike, bike, or enjoy ranger-led programs designed for kids.

Beach or Lake Getaways: With an RV, you can camp steps away from the water, perfect for swimming, kayaking, or simply relaxing in the sun.

Unique Attractions: From quirky roadside stops to family-friendly amusement parks, RVing allows you to explore off-the-beaten-path destinations that create one-of-a-kind memories.

Your RV serves as a home base, making it easy to transition from one adventure to the next without the hassle of packing and unpacking.


5. Comfort and Convenience

Traveling with kids often means packing a lot of gear, and RVs make it easy to bring everything you need for a comfortable trip.

Plenty of Storage: From bikes to board games, RVs provide ample space for all your family’s essentials.

A Home Away from Home: With your own beds, bathroom, and kitchen, RV travel eliminates the stress of hotel check-ins or finding kid-friendly restaurants. Plus, having a familiar environment can help younger kids feel more secure while on the road.

The convenience of RVing makes it especially appealing for families with young children or those who prefer a more relaxed pace of travel.
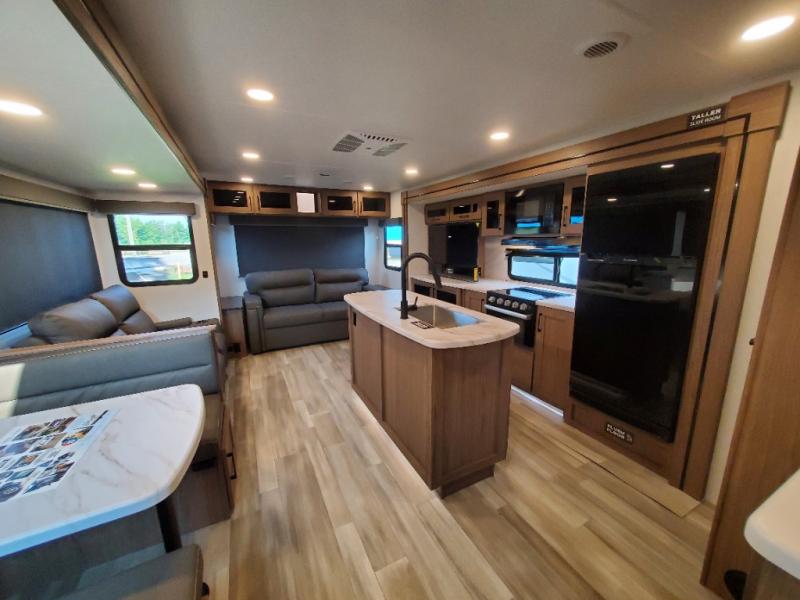

Alliance RV Delta 292RL Travel Trailer interior with a kitchen island and rear living room
This Alliance RV Delta 292RL Travel Trailer is great for families.

Tips for a Successful Family RV Trip

To make the most of your family RV vacation, keep these tips in mind:

  • Plan Ahead: Reserve campsites early, especially during peak seasons.
  • Involve the Kids: Let them help plan activities or choose destinations to keep them engaged.
  • Pack Smart: Bring games, books, and outdoor gear to keep everyone entertained.
  • Stay Flexible: Embrace the unexpected—it’s part of the adventure!

Conclusion: Make Your Next Vacation an RV Adventure

RVing is more than just a mode of travel; it’s a lifestyle that fosters connection, exploration, and fun for the whole family. With the freedom to choose your destinations, control your budget, and enjoy quality time together, RVing is an ideal way to create unforgettable family memories.

Ready to hit the road? Start planning your next family RV adventure today and discover why so many families are choosing RV travel for their vacations. Get an amazing RV today!

Top 5 Tips for Maintaining Your RV

Owning an RV comes with the freedom to explore the open road, but it also requires regular maintenance to keep it running smoothly and safely. Neglecting maintenance can lead to costly repairs and cut short your adventures. Whether you’re a seasoned RVer or a first-time owner, these five essential tips will help you maintain your RV and enjoy worry-free travels.

maintenance worker repairing the stove

1. Inspect Your RV Regularly

Routine inspections are key to identifying and addressing potential problems before they become serious.

What to Check:

  • Exterior: Look for cracks, dents, or leaks in the roof, seams, and windows.
  • Tires: Check tire pressure and inspect for wear and tear before every trip.
  • Interior: Test appliances, lights, and outlets, and inspect for signs of water damage or mold.

Regularly inspecting your RV ensures that you catch issues early, preventing costly repairs down the road.


2. Keep Up with Roof Maintenance

Your RV’s roof is its first line of defense against the elements, so keeping it in good condition is crucial.

Maintenance Tips:

  • Clean the roof regularly to remove debris, dirt, and tree sap.
  • Inspect the seals and seams for cracks or deterioration. Use sealant as needed to prevent leaks.
  • Consider applying a protective UV coating to extend the life of your roof material.

Neglecting roof maintenance can lead to leaks and water damage, which are expensive and time-consuming to fix.
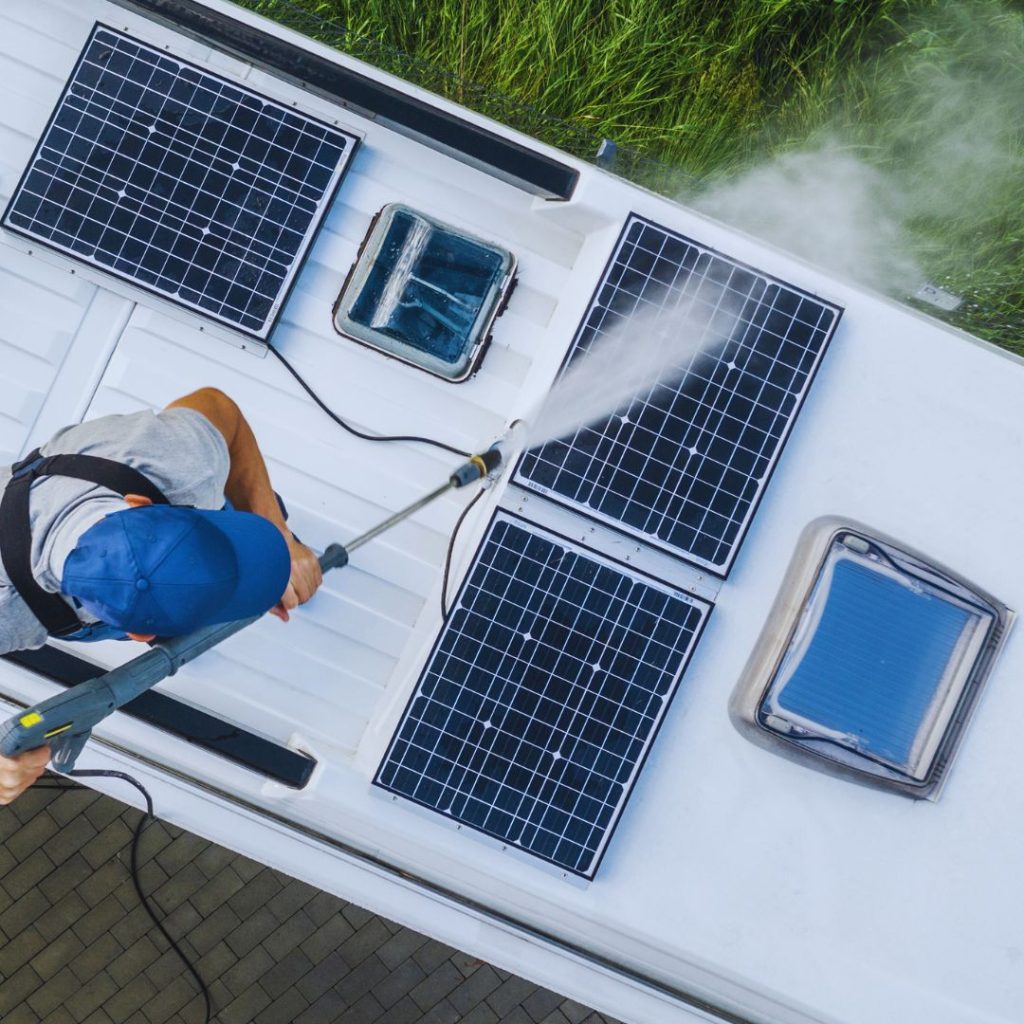
man with a blue hat cleaning the solar panels on the top of an RV

3. Maintain Your RV’s Plumbing System

Your RV’s plumbing system is vital for comfort on the road, so proper care is essential.

Key Steps:

  • Use RV-friendly toilet paper to prevent clogs.
  • Regularly empty and clean your black and gray water tanks.
  • Sanitize your freshwater tank every few months to ensure clean drinking water.

Plumbing issues can be some of the most unpleasant to deal with, so proactive maintenance is a must.


4. Take Care of the Engine and Chassis

For motorized RVs, the engine and chassis are the heart of your vehicle. Regular maintenance will keep your RV running reliably.

mechanic checking the oil

What to Do:

  • Change the oil and replace filters according to the manufacturer’s recommendations.
  • Check fluid levels (coolant, brake fluid, and transmission fluid) regularly.
  • Inspect the battery and ensure the connections are clean and secure.
  • Schedule annual maintenance with a qualified mechanic to address more complex issues.

Neglecting engine care can leave you stranded in the middle of your journey, so don’t skip these critical steps.


5. Protect Your RV When Not in Use

Proper storage is just as important as on-the-road maintenance. How you store your RV during off-seasons can impact its longevity.

Storage Tips:

  • Cover Your RV: Use a high-quality RV cover to protect against sun damage, rain, and debris.
  • Winterize Your RV: If storing your RV in colder months, drain the water system, add antifreeze, and seal any openings to prevent pests from getting inside.
  • Tire Care: Use tire covers to protect against UV damage and consider moving the RV slightly every few months to prevent flat spots.

Protecting your RV during storage ensures it’s ready to go when the travel season begins again.


Bonus Tip: Create a Maintenance Schedule

Staying organized is key to keeping your RV in great shape. Create a maintenance schedule that outlines weekly, monthly, and seasonal tasks. This will help you stay on top of inspections, cleanings, and repairs.
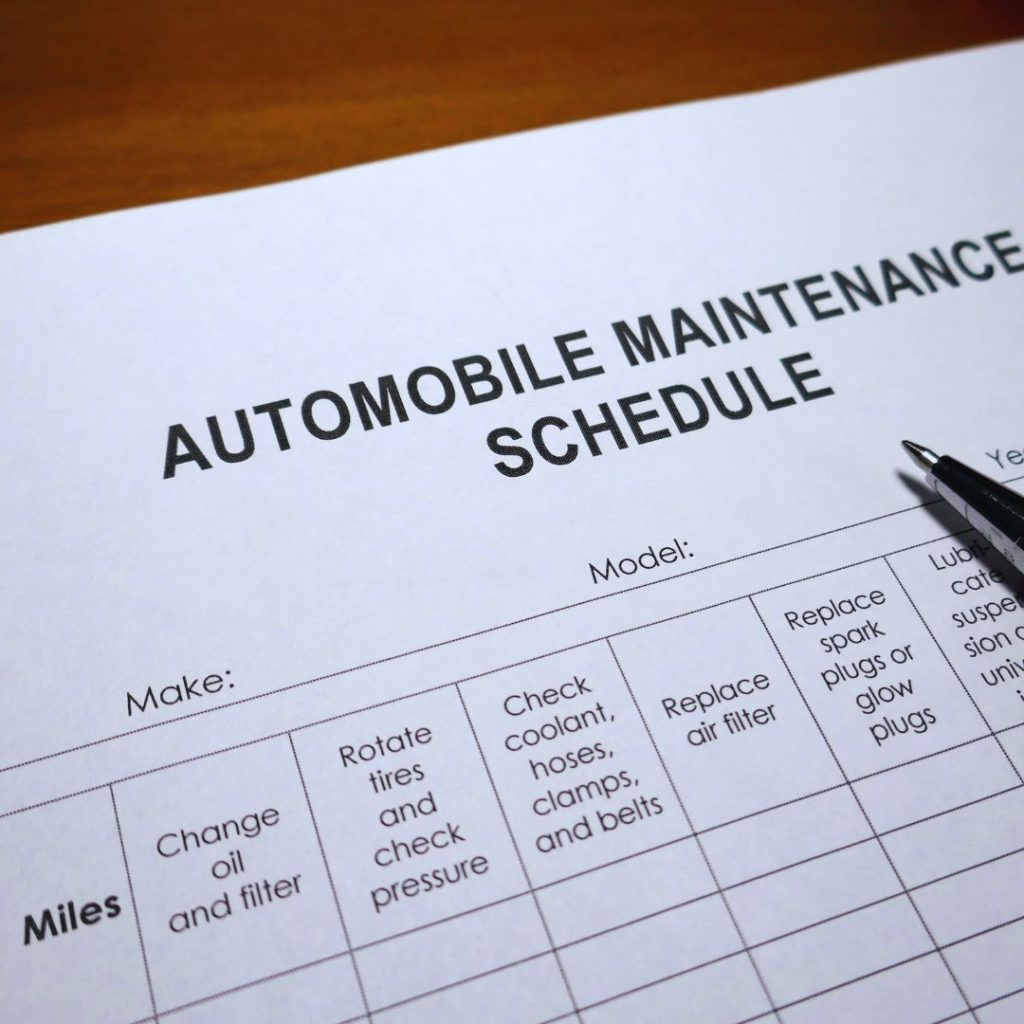
automobile maintenance schedule on paper with a pen on the side

Why RV Maintenance Matters

Taking care of your RV isn’t just about avoiding breakdowns; it’s about preserving your investment and ensuring the safety of you and your passengers. With regular maintenance, your RV will remain reliable, efficient, and ready for your next adventure.


Conclusion: Hit the Road with Confidence

RV maintenance may seem overwhelming at first, but with these tips and a proactive mindset, it becomes manageable. By regularly inspecting your RV, maintaining the roof and plumbing, caring for the engine, and protecting it during storage, you’ll be set for years of exciting travels.

Ready to hit the road? Start by giving your RV a thorough inspection and creating a maintenance plan. A little effort today will save you time, money, and stress tomorrow. Safe travels!
Grape Creek RV Park | San Angelo, Texas | RV Parks San Angelo Tx

Visiting a Seasonal Destination in the Shoulder Season

Seasonal travel destinations are considered "seasonal" for a reason. So what is it like visiting a traditionally seasonal destination during a shoulder season? What exactly is a shoulder seaon? Were we crazy to visit Northern Michigan in early May?? Listen to this week's episode to find out!...

Hearthside Grove Luxury Motorcoach Resort

This week we're visiting with brothers Craig Rose and Kirk Rose, the founders of Hearthside Grove Luxury Motorcoach Resort in Petoskey, Michigan. We talk about what it was like growing up in Petoskey, their family history of RVing, and how they evolved from making chocolate and ice cream to building a destination Class A motorcoach resort in their hometown...

The Good and Bad of Summer RV Travel + Tips!

Traveling by RV during the summer is a tradition for generations of Americans. This week, on our podcast, we're talking all about the good and the bad of Summer RV travel, plus we're sharing tips to stay safe and comfortable during the summer months...

The Cajun RV Rally

This week, we sit down with Don and Sandie Grutzmacher, organizers of the Cajun RV Rally. This rally is held annually in South Louisiana and is a celebration of music, food, culture and all things Cajun. Definitely add this rally to your list of things to do...

Wingin' It With Our Journey in Myles

You never know who your neighbors will be in a campground. Recently, we pulled into a campsite next to Mark and Sue from Our Journey in Myles. In this 100th episode of Wingin' It!, they share their full-time RV journey and some things that have surprised them about life on the road...

RVing the National Parks

Over the years, we've visited several National Parks as well as Monuments, Wildlife Refuges, Seashores,... Sometimes we've camped inside the national park and other times we've stayed at an RV park nearby. This episode is all about RVing the National Parks...

Grape Creek RV Park | San Angelo Tx | RV Parks San Angelo Tx

Grape Creek RV Park San Angelo, Texas | Blog 

DIY RV Generator Maintenance

We call it “RV generator maintenance,” but what it really boils down to is preventative maintenance. That simple two-word term is so important that it outweighs anything else. Lifespan, reliability, overall performance, safety, costs, and peace of mind all rely on your willingness to indulge in preventative maintenance measures.

Sure, we can change the oil, replace the filters, and run it regularly, but generators are just like everything else, meaning entropy begins its long, downhill process the moment you crank it up for the first time. Your job is to make it last as long as possible, whether that’s for the life of the RV or until you put it up on the marketplace.

By the way, this article applies to built-in RV generators (e.g., Onan models) and portable standalone generators (e.g., Honda, Champion), so no one is left out in the cold (pun intended). It may not be your most excitable RV-routine task, but it is easily one of the most important.

Understanding RV Generators

For RVers, there are (generally speaking) built-in generators and portable ones, but the latter is fairly diverse. These include gasoline, diesel, propane, inverter, solar, and dual-fuel types. There are big battery/fuel backups out there as well, but unless you’re hauling around a mansion, they aren’t included.

The built-in variety is a permanently installed power unit designed specifically for RVs. They are typically mounted in a dedicated compartment or undercarriage space. Built-in generators are convenience models, while portable generators are all about flexibility.

Built-In Generators

Compact, robust, and hardwired into the RV, built-in generators draw fuel directly from the RV’s gas, diesel, or propane tank. This eliminates the need to lug separate fuel cans around. They generally range from 2,500–12,500 watts of power output, depending on the size and capabilities of the rig. Common Onan models spit out roughly 4,000 watts, which is good for mid-size rigs.

Accessibility is sometimes a factor, making RV generator maintenance more difficult at times. There is a huge, often overlooked positive for built-in generators, however—noise reduction. Most hover between 50 and 65 decibels at full load. Built-in generators are designed in sound-dampening enclosures and include mufflers and vibration isolation.

“To fix the problem he says he’ll need to drop the generator out of the RV to get access to all the wiring and check for other damage, and I suspect the work won’t be fast or cheap.”

bikerv1369, iRV2 Forums

They are heavier (100–300 pounds), pricier ($3,000–$8,000), and less flexible than their portable counterparts.

Portable Generators

Portable generators are more difficult to nail down, mostly thanks to an extensive diversity of types, sizes, and uses. For the sake of simplicity, portable generators are compact, standalone power units designed to deliver electricity on the go.

They typically range from 1,000–10,000 watts, weigh 40–120 pounds, and are built for mobility, with wheels, handles, and leverage in mind. Quiet, inverter types hum at 50–60 decibels, while conventional ones are closer to 70–80 decibels.

RV generator maintenance on portable options is usually simpler than with their built-in cousins, but you have to also account for potential theft and fuel efficiency in non-inverter models. Parts are widely available too, as opposed to a more selective market for built-ins.

There are battery generators as well, but their output is generally lower (3,600 watts max/7,200-watt surge). Battery generators, powered with solar panels, are still a great option for small rigs and teardrops, and their maintenance needs are simpler.

Key Differences in Maintenance

Besides the fact that one is built into its own, cozy little nook, and the other necessitates good back posture to haul around camp, there are key differences to consider. One is tied into a motorhome’s fuel system, so its fate is tied to how well you maintain the engine compartment. Look at it on the bright side: it’s essentially a twofer.

Accessibility makes the built-ins more difficult to maintain, as well as the complexity of components. Portable generators are less expensive to maintain and easy to access, but environmental storage conditions are important, as are weather conditions, noise pollution, and fuel requirements.

It comes down to living convenience (quality of life, so to speak) versus maintenance convenience.

Tools and Supplies for DIY RV Generator Maintenance

RV generator maintenance is not always easy, as the above forum comment suggests. But it shouldn’t require a 500-pound tool chest. The right tools, rather than the most tools, are the best tools for maintaining a generator.

“Someone will come up with a nice tool list, but the possibilities are endless. I have known of people who travel with a welder and metal lathe.”

oldmattb, iRV2 Forums

This is all about making sure you don’t have to call a professional out to your RV to drop the generator, spend an hour on it, and charge you enough that you’ll have to sell one of your kidneys on the black market. So, with that interesting picture out of the way, let’s start with the basics.

One of the best tools is not a tool at all, at least not in terms of a strict definition. Routine. Establish one and take the time to write down your basic maintenance necessities by week, month, and year. RV LIFE Maintenance (part of RV LIFE Pro, available on the Apple App Store or Google Play Store) is a great app for this, especially if you need something comprehensive and multi-faceted (the app includes much more than just maintenance routines and reminders).

Basic Toolkit

Your basic RV generator maintenance tool kit is the most extensive and includes exactly what most people think it will include. You’ll need a screwdriver set, wrenches, a good socket set, a multimeter, a few pairs of pliers (maybe some needle nose if access is tight), a few paintbrushes for cleanup, and some rags.

Generator-Specific Tools

This includes generator-specific tools and “your” generator-specific tools. Not all generators are created equal, and some require different components than others. For instance, you may want to stock up on oil, but oil may vary by model. Then you have oil filters, spark plugs, fuel stabilizers, air filters, etc.

If you can, stock up on some of these items, like spark plugs and air filters. If you’re ever out in the boonies, stores are closed, or you’re in the middle of a natural disaster or its aftermath, you’ll have the things you need to keep your generator running smoothly and true to form.

An oil filter wrench may be necessary in some circumstances, depending on your generator. This is pretty rare if you’re using a portable generator, but more common in built-ins. Universal straps or cap wrenches will fit most just fine.

Safety Gear

At 85 decibels and above, exposure equals hearing loss over time. Ear muffs are a good idea, especially if you also work in an industry where you are exposed to loud noises daily. Gloves and safety glasses are a good idea as well. Most people never think they need these things until a good diesel splash in the irises disabuse such notions.

Working in the shipbuilding industry for more than a decade now, I recognize the fact that even the most innocuous things I work near can grievously injure or kill me if I lower my guard and/or fail to wear my safety gear. You just never know, so why not cover all your bases, huh?

Check the Specs

Your generator, whether it’s built-in or portable, will have its own manual or section in the overall manual that you can refer to for valuable information, troubleshooting, and, if need be, warranty information. Before you begin maintenance, check over the manual before you get started.

If you can’t find the manual or if you chucked it with the original packaging, you can access just about any manual on the planet by doing an online search for your generator’s model.

Routine Maintenance Tasks

This is your basic stuff but don’t let the words “routine” and “basic” fool you. This stage of the RV generator maintenance info-article is the most important because it’s the preventative maintenance stage. The more focused and routine you are here, the fewer your headaches will be in the future.

Pre-Use Inspection (Both Types)

A solid once-over on your RV generator ensures it’s ready to fire up reliably, safely, and without any unexpected hiccups—whether you’re prepping for a boondocking adventure or a power outage.

  • Check fuel/oil levels and quality.
  • Look for leaks, oil and fuel, underneath or around the unit. Puddles or stains signal trouble.
  • Check for loose connections or damaged cords, especially if you’ve had a recent problem with rodents.
  • For built-ins, check for nests or signs of pest/rodent activity.
  • Examine the exhaust system (built-ins especially).
  • Be sure to clear out any dust or debris.
  • For electric-start models, check the terminals for corrosion and test with a multimeter (12.6 volts is ready to go).
  • Check the air filter to make sure it’s clean and tap out any dust.

This is mostly basic stuff. Anytime you break the generator out of storage or are firing it up after moving from one place to the next, you should go through this process. As for the potential nests, you’d be surprised how quickly a mouse can set up shop, so don’t discount such things just because it’s only been a few days.

Oil Changes

A generator is its own motor, and therefore it requires an oil change periodically. On average, generators require an oil change every 50–100 hours of use. Of course, that’s not set in stone, so it’s a good idea to break out that manual again if you don’t know or aren’t sure.

Portable generators are generally pretty simple in this regard. However, built-ins may require a bit of finagling, depending on the design. Some will even require you to get down beneath them. Undercarriage access is not the preferred method for most people, so it may be worth considering if you’re looking at an RV for purchase.

Air Filter Maintenance

Air filters always seem to get left out in the cold, whether it’s RV generator maintenance or anything else. It’s so easy to forget about. However, like oil, air filters generally need a change every 50–100 hours of use. You can get away with cleaning them out for a little while, but it’s often better to just change them altogether.

Some RVers change them annually and others go by the 10,000–12,000-mile rule, whether it’s the generator air filter or the engine.

Spark Plug Care and Fuel System Maintenance

You don’t have to change spark plugs like you do air filters and oil, but they do need a careful inspection every 100–200 hours of use, or per year—whichever comes first. Sometimes, especially with built-in models, the spark plug(s) aren’t easy to get to. If your built-in doesn’t tip down or slide out, you may have to get creative with extensions and/or wobbles.

“Depending on the model, especially the 4000, they tip down. Place a floor jack or a scissor jack from your car under the outer edge. There are two bolts that release the generator and let the outer edge drop down. It will give you access to the rear plug.”

-Dutch Star Don, iRV2 Forums

Whether it’s a pain in the rear or not, the inspection/replacement process must go on. Without a functioning spark plug, you don’t have a working generator. Inspect the spark plug for signs of corrosion, fouling, or electrode erosion. If there are signs of any of the above, it’s time to make the change.

Fuel quality is critical for RV generators. Stale fuel or otherwise contaminated fuel is more than enough to clog the carburetor, gum up your fuel lines, or damage the engine. Gasoline, just sitting in the tank unused, will remain viable for 30–60 days before it begins a form of chemical degradation.

  • Always use fresh fuel or stabilize stored gasoline.
  • Use ethanol-free gasoline whenever possible (ethanol attracts moisture and kickstart .”phase separation” and corrosion.
  • Circulate treated fuel for 5–10 minutes and fill the tank before storage.
  • Run a stored generator once per month, for 20–30 minutes.
  • Check and replace filters and lines accordingly.
  • Use only clean, approved fuel containers, and keep the tank cap sealed when not in use.

Altitude and temperature have an impact on performance, so increase your inspections and generator maintenance procedures when in extreme or elevated conditions. You should always have a spare spark plug on hand, just in case.

Troubleshooting Common Issues

RV generator maintenance and troubleshooting issues are difficult to cover, mostly because there are so many tiny things that can go wrong. Fortunately, many of these issues are fairly common and worth mentioning here. Again, a healthy dose of preventative maintenance will avoid the vast majority of generator transgressions against their owners.

So, feel free to indulge, so you don’t end up having a very bad day out in the middle of nowhere or an extreme weather event.

Generator Won’t Start

Start with the basics. It may sound dumb, but checking the fuel level is the first task. We’re all forgetful, so there’s no reason anyone needs to know you’ve been trying to start your generator all morning with an empty fuel tank. Another silly thing that’s worth checking is the on/off switch if your generator is equipped with one. You can have a facepalm moment afterward. The rest are fairly general, so work your way through them one by one.

  • Check the battery (for non-pull-start models) for proper voltage, clean wiring, and terminals.
  • Check your oil level (some generators have a low-oil shutoff sensor.
  • Make sure the fuel cutoff valve (only if applicable) is open.
  • Check over the fuel pump.
  • Check the fuel filter and lines.
  • Check the carburetor (often near the air filter box in portables or behind a shroud/top cover in built-ins) by inspecting the fuel line from tank to carburetor, checking for external gunk, and smelly sludge.
  • Check flow by removing the fuel line at the carburetor and turning on the fuel valve or cranking the starter.
  • Pull the spark plug after failed cranking and check to see if it is wet (wet = flooded carburetor).
  • If everything looks OK, blast the bowl, jets, and passages with aerosol carburetor cleaner, let it sit, then wipe or blow out the residue.
  • If you remove the bowl, carburetor, or other parts, check the gaskets to see if they are degraded in any way.
  • Check the spark plug by grounding the plug against the engine block, pulling the starter, and looking for a blue spark.
  • Check the air filter for cleanliness.
  • Ensure the choke is up if it’s a cold start and down if it’s a warm start.
  • Check for error codes (built-ins) on the control panel and verify the RV’s 12-volt system isn’t tripped.
  • Prime the carburetor with a small squirt of starting fluid or gas directly into the air intake (if it fires briefly and dies, there’s a fuel-delivery issue).

Low Power Output

Just because your generator is working, doesn’t mean you’re getting 110%. Generators have an expected voltage, wattage, or ability to handle loads. When you’re getting a low power output, it generally boils down to engine performance, electrical issues, or overload.

  • Plug in a known, 100-watt device, like a bulb or multimeter-equipped gadget, and look for flickering or dimming.
  • Use a multimeter to measure voltage and ensure it is correct.
  • Listen for sounds of bogging down.
  • If equipped, ensure “Eco-Mode” is off (portables).
  • Check the governor (built-ins). RPM should increase under load.
  • Check the fuel filter, lines (kinks or leaks), and carburetor jets (clean them if they’re gummed up) for optimal fuel flow.
  • Never start a generator with stale fuel.
  • Check alternator brushes, capacitor, voltage regulator, and wiring.
  • For inverter units, look for warning lights indicating the inverter is failing.
  • Run the generator unloaded, steadily increasing the load in known increments, until you’re past midway, looking for voltage drops, sporadic RPM, and the sound of the engine bogging.

Excessive Noise and/or Vibration

This is the simplest of the bunch because it usually boils down to loose components, the positioning of the generator, or the exhaust. Readjust the portable genset and see if the problem persists. For both built-ins and portables, carefully inspect throughout, looking for loose bolts, screws, etc.

“Depending on what surface you’re parked on, the noise from the 4000 can bounce off of the ground. Try throwing a piece of thick carpet or padding under it when running. This can absorb/deaden some of the noise.”

-Dutch Star Don, iRV2 Forums

It’s like hair getting caught in a box fan, waking you up in the middle of the night. It’s usually harmless, but you have to find it before it drives you mad. In this case, the noise may drive your neighbors mad as well. Check your exhaust and try to keep your ear open to subtleties in the background, which will help you zero in on the exact location of the noise.

Seasonal and Long-Term Care

Seasonal and long-term care, in terms of RV generator maintenance, is just as important as all the little things you do to keep up with preventative maintenance.

  • For pre-season prep, be sure to run the generator under load for 30 minutes, check all the systems thoroughly, and ensure the tank is full and the fuel stabilizer is in place.
  • Use covers while in storage, and cover the exhaust for built-ins.
  • Periodically check throughout the length of the storage, for dust, debris, or pests.
  • Run the generator monthly, for 20–30 minutes to prevent carbon build-up.

You don’t have to jump through hoops to maintain your RV generator while it’s in storage, but you at least have to cover the above basics. No matter where you are, always make sure you work in ventilated areas, especially if you’re actively running it or dealing with the fuel.

Always disconnect power/fuel prior to repairs. For built-ins, watch out for hot components. Built-in units often require a college degree in Yoga, with an aptitude for stretching and flexibility. When you have to get in that close, getting burned is a distinct possibility.

Last but not least, always handle portables carefully, especially when transporting them to and from for storage purposes. They’re already fairly exposed, so external damage can easily turn into an internal problem. Cover everything well, cut off the lights, and come back once a month to crank it up for a run.

Conclusion

RV generator maintenance is a must for RVers. You don’t have to love it, but you do have to maintain it. Of course, this doesn’t cover every little thing that can possibly go wrong, but it does hit the basics. DIY skills will save you a ton of time and money. The more you can do on your own, the fewer times you will have to fork over $75+ per hour for someone else to do it.

Be sure to cover the key preventative maintenance steps, whether you’re storing the generator or you’re about to hit the road. You never know when a generator will become a must-have component of your RV—especially in adverse weather or natural disasters. Take good care of your RV generator, and it will return the favor a hundred fold.


The post DIY RV Generator Maintenance appeared first on RV LIFE.

Camp ABQ at High Desert RV Park

If you’re planning to take a trip to the Southwest, chances are good that Albuquerque camping is somewhere on your itinerary! Albuquerque is the most-populous city in New Mexico by a wide margin and it’s easy to see why so many people love it. The weather is warm all year long, it’s surrounded by scenic mountains, and the town is full of history.

It’s also a wonderful destination for RVers. There are some lovely parks within the city’s borders, and the surrounding rural areas are ideal for those who want a bit of distance from the hustle and bustle. Snowbirds flock to this city during the winter, but it’s a great place to visit all year long.

There’s no shortage of options when you’re looking for campgrounds, RV parks, or nature preserves. But one option that stands out from the crowd is High Desert RV Park. This campground has excellent reviews, a wealth of amenities, and a location that gives you the perfect balance of excitement and serenity.

Overview

High Desert RV Park is located at 13000 Frontage Rd SW in Albuquerque. It’s within the borders of the city, but positioned right on the western edge. The park is also right off of the I-40 highway so it can be an excellent pit stop if you’re traveling along this route.

But whether you stay for a single night or an entire season, High Desert RV Park will welcome you with open arms. You can easily get to the main city in just a few minutes or just enjoy the peace and quiet that desert camping can provide.

This is a mid-sized RV park, with 76 sites available. In a place that gets as hot as New Mexico, full hookups are essentially a necessity. You need to ensure that you have plenty of water as well as the power to keep your A/C and fans running.

Fortunately, every site at this park comes with full hookups for water, sewage, and electricity, but the amperage will vary depending on which site you choose. Both 30- and 50-amp sites are available, so just be sure to reserve the one that you need before you arrive.

Rates

Albuquerque camping can get expensive, especially if you visit during snowbird season or when there’s a large festival taking place. But the High Desert RV Park distinguishes itself as a campground that offers a wonderful experience for a fair price.

Guests can stay here for between $45–$50 per night (depending on the amperage of the site). Discounts are available for those who set up camp for a week or longer. Essentially, the longer you stay, the more nights you get for free.

In addition, High Desert RV Park is open all year long. You can even book your site for months at a time, ensuring that you’ll always have a spot in this warm and toasty state. As long as you make preparations in advance, you don’t have to worry about missing your window for camping season here.

To make online reservations or just to learn more about this park, visit the campground website at highdesertrvpark.net

Amenities

Photo courtesy RV LIFE Campgrounds.

An RV park without amenities is just a parking lot! Luckily, High Desert RV Park has plenty of comforts to help guests relax and keep up with their day to day tasks. Here, you can enjoy Albuquerque camping in style. Although it’s not a full-on resort, it’s definitely a step up from most campgrounds you’ll find in the desert!

For starters, all the essentials are covered here. Guests can enjoy access to private bathrooms and showers, making it easy to stay fresh and clean on the hottest days. On-site laundry facilities are also open for use so you don’t need to worry about taking lengthy trips into town just to wash your socks.

There are paved roads throughout the campground, making it easy to navigate and park your rig. All of the sites are also leveled and landscaped with red sand and desert-friendly foliage. You can enjoy a bit of greenery and shade, as well as appreciate the local biodiversity! Statues and sculptures are also scattered across the area for some extra fun.

The sites come with picnic tables for outdoor dining or socializing. Complimentary Wi-Fi also broadcasts over the whole area. So if it gets too hot outside, you can crank up the A/C and kick back with your favorite TV shows and online content.

There are also several shared spaces and amenities that every guest can enjoy. For instance, you could take your dog to the on-site pet area and meet up with your fellow campers. There’s also an activity center with billiard tables where you can test your skills and enjoy some friendly competition.

If you need to service your RV, you can also do that here! There are car vacuum cleaners available if you need to clean out your interior. Propane is also sold on-site to keep your various appliances running smoothly.

Nearby Activities/Attractions

Albuquerque draws people in from all across the country. It has so many attractions, museums, and festivals throughout the year that there’s always something to see. Albuquerque camping in an RV is a great way to experience the city while still maintaining a certain level of comfort and freedom.

Nature lovers will love visiting the ABQ Biopark Zoo, Aquarium, and Botanic Garden. This complex has everything and it’s worth spending a full day here( if not more!) You can also see beautiful sights from the Sandia Park Tramway or visit parks like the Petroglyph National Monument and Tingley Beach.

If you love learning something new, there are also plenty of museums and historic places within the city to visit. Check out the New Mexico Museum of Natural History, the Indian Pueblo Cultural Center, and the National Museum of Nuclear Science & History.

If you want a more free-form adventure, stroll through Old Town Albuquerque, stopping at the various shops and cultural sites along the way. There are also plenty of walking tours, bar crawls, aerial flights, and other ways to explore the city.

And of course, we can’t mention Albuquerque without talking about the famous International Balloon Fiesta! This colorful spectacle generally happens during early October each year and it always draws in huge crowds. Albuquerque camping can be tricky during this time of year, so be sure to secure your spot well in advance.

Finally, this city is a paradise for foodies Of course, south-of-the-border flavors are always on the menu here, but there are dining options for every palette. Some of the most popular restaurant options include:

Reviews

And now it’s time to explore the most important metric for any RV park: the reviews. A scenic location and roster of amenities is all well and good, but it doesn’t mean much unless visitors can report that they had a positive experience.

Fortunately, the High Desert RV Park is the total package, with great reviews and an attractive setup. On RV LIFE Campgrounds, more than 350 people have shared their thoughts and feedback for this park. And this has earned it a cumulative score of 8.6/10! This makes it one of the most highly-regarded destinations for Albuquerque camping.

Guests complimented the size of the RV sites, saying that they didn’t feel cramped during their stay. Many people also said that they enjoyed the location here because it was close to the city of Albuquerque and attractions like the Petroglyph National Monument.

The decorations around the campground were also universally enjoyed. The statues of cowboys, animals, Native Americans, cacti, and various artistic sculptures made this park one in a million.

Be sure to book your spot early so you don’t miss your chance to stay at one of the most popular and beloved RV parks near Albuquerque. If you want to read more firsthand accounts from guests, check out High Desert RV Park’s page on RV LIFE Campgrounds.

Related Articles:

The post Camp ABQ at High Desert RV Park appeared first on RV LIFE.

Don’t Head Into Camping Season Without This RV Training

collage of photos showing girl performing various performance checks on her RV and watching videos on her llaptop as part of lab work for an RV training course

The Online RV Training That Could Save Your Camping Season—and Your Wallet

The course was provided to me for review, but all insights and opinions expressed here are my own.

Camping season is around the corner—and while you’re probably dreaming about lakeside sunsets or boondocking under the stars, your RV might have other plans.

No matter how prepared you think you are, RV life has a funny way of throwing surprises your way. After a decade on the road, we’ve had our share of breakdowns, quirks, and “what the heck is that noise?” moments.

Now, my husband has always had a knack for figuring things out. But somewhere along the line, I realized I was leaning on that way too much. I’d nod along while he explained something about our water heater or electrical system, but truthfully? I wasn’t absorbing a thing.

And that’s a problem—because we both live in this RV. I needed to stop coasting and start understanding the inner workings of our home on wheels, not just for emergencies. That decision led me to the RV Owners Home Study Course PRO, developed by the National RV Training Academy (NRVTA) and distributed by rvtechcourse.com.

I wasn’t looking for quick fixes. I wanted RV training that would give me real understanding and confidence——and maybe even help me impress others with my newfound technical vocabulary. Because here’s the thing: the more you know about your RV, the smoother your adventures unfold—and the less you have to fake knowing what a capacitor does.

Getting to Know the National RV Training Academy (NRVTA)

If you’re going to learn how to take better care of your RV, you might as well learn from the people who do this day in and day out. The National RV Training Academy (NRVTA), located in Athens, Texas, is a Certified Texas Workforce Commission (TWC) Career College. They offer everything from basic training for RV owners to advanced technical programs for folks who want to become certified technicians or inspectors.

What makes NRVTA stand out is their balance of classroom-style instruction and hands-on training—something that really helps the information stick.

RV Fundamentals Training: Course Content

At NRVTA, every student starts with the RV Fundamentals Training. It’s the foundation for everything else they teach—whether you’re just trying to better understand your own rig or thinking about a future in RV tech.

This course covers all the major systems you’ll find in an RV and explains them in a way that makes sense, even if you’re not a naturally technical person. Here’s a quick look at what’s included:

  • Basic RV Electricity – The fundamentals of how electricity works in your RV: voltage, amperage, wattage, and ohms.
  • DC and AC Electrical Systems – How both types of current operate in an RV, including safety practices and how to identify common components.
  • RV Propane Systems – Operating basics, safety checks, and how to detect leaks.
  • RV Water Systems – How to handle fresh, gray, and black water systems, along with winterizing and general maintenance.
  • Climate Control Systems – Troubleshooting and caring for your A/C, furnace, and fridge.
  • Exterior and Mechanical Systems – A look at slideouts, seals, roof components, exterior panels, and even wheel bearings.
  • Hands-On Labs – Step-by-step exercises that let you put your learning into action and actually work on real systems.

The RV Fundamentals Training is offered as a one-week certified course on-site in Texas. But if you’re like me and can’t always drop everything and head to the Big Red School House, there’s a solid alternative…

Online/At-Home RV Training Courses

If you’d rather learn about your RV on your own time and turf, RVTechCourse.com makes that totally doable. They offer two versions of the RV Fundamentals Training in flexible, home-study formats: one fully online, and one that includes a USB drive and printed materials.

Online Home Study Course:

This version gives you access to all the training videos and PDF booklets through RVTechCourse.com’s online student portal. Once you sign up, you’ll get login info so you can start learning right away—anywhere you’ve got internet access.

USB Home Study Course:

Prefer something you can hold in your hands or use offline? This option comes with all the videos on a USB drive and printed materials shipped to your door. You still get access to the online portal, too—so you can choose how and where you learn.

There are also two levels:

Home Study Course: A great intro to essential RV maintenance topics—perfect if you’re just getting started.

Home Study Course PRO: This version includes everything from the Home Study Course, plus hands-on labs that walk you through working on your own rig. It mirrors the in-person RV Fundamentals course and, if purchased at full price, comes with a $300 credit toward attending in person down the line.

Both versions offer the flexibility to learn on your schedule, revisit lessons whenever needed, and avoid the travel-and-lodging expense. Whether you’re watching the videos from your dining table or flipping through the workbook on a rainy day at camp, the course is built to fit real RV life.

My Journey Through the RV Owners Home Study Course PRO

When I started the RV Owners Home Study Course PRO, I didn’t realize just how much I’d been glossing over when it came to truly understanding our RV. While I had a general idea of how things worked, the course quickly showed me how deep the rabbit hole really goes—especially when it came to the electrical system, which turned out to be the most extensive and enlightening part.

Breaking Down Every RV System

The RV training course starts with the basic principles, drilling into electricity at the level of electrons. From there, it builds on that foundation, moving into units of measurement and how they’re manipulated in both DC and AC systems. Each section connects to the next, so by the time you’re digging into more intricate topics like load balancing or fault troubleshooting, you’re not lost—you’ve got the groundwork to follow along.

The RV training home study program walks through every major RV system, explaining how they work, identifying common issues, and guiding you through practical troubleshooting steps.

The best part? I could go at my own pace. If something didn’t click right away, I could pause, replay, or just take a beat to think. And yes—I hit replay a lot. But having that freedom to revisit sections as needed made a big difference in how well I absorbed the material.

A Customizable Learning Experience

I also printed out the PowerPoint presentations, maintenance guides, and troubleshooting handouts, sticking them all in a binder along with my own notes and diagrams. That binder and accompanying videos have since become indispensable, something I pull out anytime something seems off. It’s like having my own RV owner’s manual—but one that actually makes sense.

The hands-on labs were another highlight. Each task was clearly explained and demonstrated in the videos, and then I got to perform it on my RV. It was practical, engaging, and genuinely satisfying to complete a lab and know I’d done it myself.

Todd Henson, the main instructor, was a big part of what made this course so effective. He has this great way of breaking down complex topics, tying them to hilarious stories and real-world scenarios—from Ohm’s Law to propane systems. It felt like he was talking with me, not at me, which made the learning process not only easier but more enjoyable.

The Sights and Sounds of Understanding

From left to right: Checking the voltage of our adapter, tightening screws of the neutral bus bar, priming GasStop connector; testing the “health” of A/C compressor; checking the capacitance of our compressor capacitor

I didn’t rush through the course. I took my time over a couple of months, working through the labs, testing out what I was learning, and really getting to know our RV’s systems in a way I never had before.

  • –>I’ve started paying closer attention to the sequence of sounds when our propane system kicks on: the click of the solenoid opening, the tick-tick-tick of the igniter sparking, and finally, the satisfying boom of combustion as the burner ignites. But the learning didn’t stop there.
  • –>I climbed onto the roof to test the capacitance of our “Herm” capacitor and learned how to check the health of our A/C compressor. 
  • –>After hooking up a freshly filled portable propane tank to our motorhome’s Extend-a-Stay kit, I primed the GasStop attachment and got everything flowing for the first time.
  • –>I also got hands-on with testing polarity at our RV’s shorepower connections and adapters. On top of that, I started paying more attention to how our RV’s circuits are divided within the unit, learning to balance which appliances I run simultaneously to avoid overloading.

What used to feel like random noises, tripped breakers, or mysterious malfunctions now makes sense. I understand what’s happening in those moments—and why. And having that kind of knowledge has given me a level of confidence I didn’t realize I was missing.

A New Dynamic on the Road

What really surprised me was how this online RV training course changed the way I approach nomadic life with my husband. Before, I left most of the troubleshooting to him. I’d chime in here and there, but I wasn’t really contributing much when things went sideways.

Now, I’m jumping in with my own ideas and suggestions, and we’re working through problems together. It’s been such a great bonding experience, something I didn’t expect from learning about RV systems. These days, we’ll sit and debate things like slideout lubrication schedules or appliance maintenance, and it makes me feel like we’ve leveled up as a team.

Why Every RVer Needs This Course

Whether you’re brand new to RV life or have years under your belt, the RV Owners Home Study Course PRO offers something invaluable: knowledge and confidence.

For beginners, it lays a solid foundation—turning all that intimidating jargon into clear, usable knowledge. For seasoned RVers, it fills in the gaps and helps you tackle issues that might’ve otherwise meant a pricey service call or a trip delay. And if you’re getting your rig ready for camping season? This kind of training is one of the smartest ways to prepare—not just your RV, but yourself.

What sets this course apart is its flexibility. You don’t need to commit to attending in person or completing it on a set timeline. Instead, you can learn at your own pace, revisit sections as needed, and adapt the lessons to your specific RV. The PRO version’s hands-on labs take this further by allowing you to practice skills and concepts directly on your vehicle, ensuring what you learn sticks.

By understanding the fundamentals, you’ll be better equipped to troubleshoot common problems, communicate clearly with service professionals, and make informed decisions about your RV’s care. Whether you’re trying to prevent issues or just want to know what’s happening behind the scenes, this course gives you the tools to approach RV ownership with greater ease and independence.

Final Thoughts: Becoming a More Capable RV Owner

RVTechCourse.com’s RV Owners Home Study Course PRO has completely changed the way I approach RV ownership. It gave me a deeper understanding of how our systems work and, more importantly, the confidence to take a more active role in maintaining and troubleshooting them.

Instead of hoping everything works when we fire up the rig, I now feel more prepared to handle what comes our way—and more invested in keeping things running smoothly.

If you’re ready to understand your RV on a deeper level—not just how to use it, but how to take care of it—this course is absolutely worth your time. Whether you’re tired of feeling unsure when something goes wrong, want to stop relying on service techs for every little thing, or just like the idea of becoming more confident and capable on the road, this training gives you the tools to get there.

Camping season is coming. The big question isn’t whether your RV is ready—it’s whether you are.

And while we’re on the subject of empowering RV owners, check out RV Entrepreneur Podcast Episode #380.

In this episode, Brenda Puckett and Dana Hext—both NRVTA graduates and instructors—share how they’re helping more RVers, especially women, gain the skills and confidence to understand and operate their RVs through hands-on, approachable training.

Their journey is inspiring, and their mission aligns so well with what this course offers: real knowledge, real confidence, and the freedom to take charge of your RV.

🎧 Give it a listen here: Empowering Women in RV Tech – RVE 380

The post Don’t Head Into Camping Season Without This RV Training appeared first on RV LIFE.

RV A/C Maintenance for Spring

Performing RV A/C maintenance in the springtime is a smart move for several practical reasons, including swamp, er, well, you know where that’s going. You’re gearing up for warmer weather and the most popular time for RVs to hit the road. After months of storage, your A/C unit probably collected some dust, debris, potential pest intrusions, and more.

Besides, spring temperatures are pretty mild, making it an ideal time to test and troubleshoot your system without the urgency of summer heat bearing down on you. You can take your time checking over filters, coils, and other components while weeding out that weird squeaky noise that was bothering you the year prior.

A/C maintenance is also a money-saver. Addressing small problems now, such as weak seals or low refrigerant, will avoid more expensive repairs in the future or a catastrophic failure while you’re boondocking in Alamogordo, New Mexico, in the middle of July. No thanks!

Understanding RV Air Conditioners

Knowledge is power, as the saying goes, and it’s a good idea to know your RV A/C, whether you’re doing maintenance in the spring or in the middle of summer time. The most common RV rooftop unit is a 13,500-Btu A/C with compactly integrated components. Do yourself a favor and get to know each so you can take that thing apart and reassemble it in your sleep.

  • Compressor: The compressor is the beating heart of the system, pressurizing the refrigerant gas in preparation for a cooling cycle.
  • Condensor Coil: Refrigerant leaves the compressor, passes into the condenser coil, and releases heat as it converts from gas to liquid.
  • Evaporator Coil: Liquid refrigerant passes into the evaporator coil, expands back into a gas, and absorbs heat from the RV’s interior.
  • Fans (Blower): Most RV A/C units have two—one to push hot air over the condenser and one to distribute cool air inside.
  • Refrigerant: An R-410A or R-134a chemical that cycles through the system, changing states and absorbing heat.
  • Air Filters: Removable screens that capture dust, dirt, and debris, filtering it from the system.
  • Thermostat: A control unit that’s either built into the system or wall-mounted. It communicates with the system, turning it off or on according to the interior temperature.
  • Capacitors and Electrical Components: Start and run capacitors help the compressor and fan motors kick on and operate smoothly.
  • Housing and Shroud: The exterior cover that protects components from weather, UV rays, and debris. Interior ducts or vents direct airflow efficiently.

And that about wraps it up—all the typical components in a common RV A/C system. Preventative maintenance in the spring demands a degree of familiarity with these components. In other words, if you don’t know what you’re looking at, you probably shouldn’t take it apart. Just a thought.

Tools and Supplies for RV A/C Maintenance in the Spring

Inevitably, you’re going to come across dust, dirt, and debris, so a good paintbrush and a vacuum cleaner (Shop-Vac is recommended) are necessities. Pack a multimeter for the ride as well. You’ll need it to test your capacitors, wiring, or thermostat for continuity and voltage. You don’t want to do all of that with your fingers. 

Make sure you have a quality socket/wrench set and plenty of screwdrivers. Don’t skimp on this one and grab a cheap set from Wally World. Anyone indulging in a craft of any kind is only as good as their tools. A solid socket set will be useful to your great-grandchildren, assuming we all survive the zombie apocalypse. 

“Get a kit with real set of 1/4–3/8 sockets and ratchets maybe just the larger 1/2 sockets, like. 5/8, 11/16-ish and up. Some kits are stretched by using adapters but the extra length can be too much. Get a multi screw driver or two. A decent set of butt connectors crimper strippers or kit. Multi meter. Couple crescent wrenches and a 12v test light.”

-153stars, iRV2 Forums

Gloves, safety glasses, flashlights, and/or headlamps go without saying. You can’t haul an RV around if you’re blind from debris or cleaning spray from cleaning your A/C. Light machine oil is a good lubricant of choice. It works well for oiling the fan motor bearings and other moving parts.

Invest in a fin comb for straightening out those bent condenser or evaporator fins. It’s very convenient. A reusable, washable cleaning rag or cloth is useful for wiping down surfaces and for cleaning up excess lubricant or cleaning solution. 

Optional but Helpful

The better prepared you are for RV A/C maintenance come springtime, the smoother this task will go. A commercial solution coil cleaner is a safe bet, as well as a tape measure and leak-detector spray. 

The tape measure is good for double-checking your filter sizes before you jump online or head over to the store and purchase the wrong one. Refrigerant leaks are a concern as well, and a leak detector spray will help spot these leaks. However, recharging often requires a professional. 

An Amp Clamp is useful for measuring the current draw of the compressor—helpful in diagnosing refrigerant leaks. 

Step-by-Step Spring Maintenance Guide

At last, we arrive at the fun part—doing the work. Somebody’s gotta do it, right? Things might get a little complicated, especially if this is your first go-round, but the process itself is fairly straightforward. Before you haul yourself to the top of your RV, make sure you turn off all power to the RV (generators, batteries, shore power, etc).

1. Inspect the Unit

Remove the exterior shroud (usually requires a Phillip’s head screwdriver) and inspect for obvious, visible damage. Also, look for debris, dirt, or pest damage that may affect the A/C unit’s performance. Look for nests and inspect any visible wiring for chew marks or corrosion. 

RV maintenance in the spring is the best time for discovering bent fins, dented or cracked housing, and other deformities or damages the air conditioner unit may have endured since the last time you checked. 

2. Clean the Filters and Coils

Pull the air filter(s) out (typically located behind the interior vent or grill—check your manual). If it’s still in good shape and reusable, wash it with warm water and mild soap. If it needs replacing, do so. Bust out the Shop-Vac and clean any debris from the evaporator and condensor coils while you’re at it. 

“I use a shop vac with the small brush attachment to vacuum out condenser coil, be careful not to bend the fins on the condenser coil, if you do take a razor knife or small flat head screwdriver and straighten them back out, a small toothbrush helps to clean with to.”

-cardwellmarty, Forest River Forums

Once you’re done vacuuming, spray some foaming coil cleaner on both coils and let it sit there for 5 minutes (10 minutes, max). Rinse with warm water, but be careful to avoid getting water on sensitive components. Check the fins carefully and straighten them with your fin comb if necessary. 

3. Test Electrical Components

Before you get started, check the wiring, connectors, and any visible electrical components for fraying, corrosion, or loose connections. Check your manual for exact specs (typically 110-120V AC) and ensure the RV has power so you can accurately test everything. 

Before you start on the A/C, set the multimeter to AC and measure the voltage at the campground pedestal just to make sure you are getting the proper power supply. 

Check the compressor and the fan capacitors for proper voltage. Test the thermostat by setting it to cool. It’s also a good idea to listen carefully to the compressor and fans as they kick on. You want to make sure that they are indeed kicking on and not making any unfamiliar noises. 

Exceptions to the Above

Most rooftop RV A/C units, like Dometic or Coleman models, run on 110-120V AC power from shore, generators, or an inverter converting DC to AC. However, smaller rigs with portable A/C units and other exceptions may use 12V DC thermostats. 

Just be sure to set your multimeter accordingly after going over your manual for the A/C unit and thermostat. 

4. Check Refrigerant Levels

As a part of your RV A/C maintenance checking refrigerant levels in the spring or any time of the year is a bit of a misnomer. These are sealed systems, unlike a car’s A/C with a sight glass or other indicators. There’s really no “user-friendly” method for checking the level. 

What you’re mostly looking for is signs of low refrigerant or signs of leaks. It’s a system of assumption, and we all know what they say about assumptions. However, you have to work with the system you’re given. Professionals typically use a manifold gauge set or a temperature differential check.

As for the rest of us non-pros, look for frost or ice on the evaporator, visible through the interior vent. Oily residue around lines or coils is a sign of a slow leak as well. Last but not least, the test cycle, covered more in-depth below, will speak volumes in this regard. 

5. Lubricate Moving Parts

If you don’t already know what to look for, check your manuals to locate the fan motor bearings or other moving parts that require periodic lubrication. Not all RV units require this, so it may be necessary to ask a professional just to be certain one way or the other. 

“I’m going to look for the oil tubes but a little 3 in 1 oil on each end of the shaft should help prevent it again. I think I will do the coils when I return.”

-jamesp-FRF, Forest River Forums

A few drops of light machine oil (3-in-1 oil or something similar) on accessible bearings is plenty. Wipe off any excess, and that’s all there is to this one. 

6. Run a Test Cycle

Reassemble your unit unless you want to find out what an A/C unit does when partially disassembled and coursing with power. Make sure the shroud is back on and the screws are in place.  Set the thermostat to a cool setting, something like 70°F. If it’s cool outside, the interior is usually warmer. If you have to, place it on the lowest cool setting. 

Let the A/C run for about 20 minutes. Listen to it, get a feel for it, and check your vents to ensure you’re getting plenty of air and that the air is cool. Listen for unusual noises (grinding, squeaking, rattling, etc). The air from the vents should be 10-20°F cooler than room temperature. 

Benefits of Regular Maintenance

First and foremost, the primary benefit is a functioning A/C unit that will keep the interior of the RV cool when you can fry an egg on the sidewalk outside. However, it’s not enough to keep things cool. You want the A/C to provide the maximum benefit with the best efficiency. 

Lower energy draw means less drain on your RV’s battery, generator fuel, or shore power. For instance, something as simple as dirty air filters can bump your energy use northward by 10% to 20%. That’s a simple solution and a measurable benefit. 

Performing routine RV A/C maintenance every spring will extend the lifespan of the unit by maintaining lubrication for the moving parts, fixing small leaks, and preventing overwork. With routine care and preventative maintenance, the average RV A/C unit should last a decade or more. 

Maintenance also means fewer costly repairs in the short and long term. Think about it like this: a $50 service call or maintenance fix versus a $500 compressor swap. Most people will jump on the former and avoid the latter like the plague. 

Consistent comfort and healthier air quality are secondary benefits, but no less important to RVers. If you have allergies or suffer from seasonal allergies, it’s more than “secondary.” In short, regular maintenance keeps your A/C efficient, durable, and dependable in exchange for only a few hours of labor a year. 

Who can argue with that?

Conclusion

RV maintenance in the spring may not be the most exciting part of your year, but it beats a blowout while draining your black tank. It definitely beats a busted A/C while visiting Key West in August. Believe it or not, there are places on your body that you never thought could sweat until you hit up the Florida Keys with no A/C. 

Start early in the springtime, knock it out, and get it done with. After that, it’s a matter of an occasional inspection and keeping your filters clean and replaced as needed. RVers should think of preventative maintenance as a law. It’s easy to get aggravated by the effort sometimes, sure. 

However, think about all of the problems you never know about and will never experience because of what you’re doing right now. Take care of your RV, and it will take care of you. Be sure to add any hints, tips, or advice from your own experiences as an RVer in the comments below. Stay safe!

The post RV A/C Maintenance for Spring appeared first on RV LIFE.

There’s More to North Carolina Than You Think— Here’s Where to Find It

Sponsored by River Pointe RV Park
RV park set behind a group of trees
Photo courtesy of RV LIFE Campgrounds

This North Carolina RV Park Sits in the Perfect Spot for Adventure and Small-Town Charm

Ask most people about RVing in North Carolina, and they’ll probably bring up the Outer Banks or the Blue Ridge Parkway. But sandwiched between those well-traveled routes is a stretch of foothills where the rivers are just as inviting, the trails just as scenic, and the crowds a whole lot thinner. 

This is where Lake James spreads out against a backdrop of rolling mountains. Where hikes take you to places with breathtaking, panoramic views. And where communities still have that easygoing, small-town feel—the kind of place where everyone knows your name. 

And if you’re looking for a North Carolina RV park that puts you right in the middle of it all, River Pointe RV Park in Morganton makes a solid home base.

“This was our 4th stay here, very convenient on our various travels. One night stay on our way out west. Very nice campground, well maintained. Close to I40.”

Icecube | RV LIFE Campgrounds

Experience This Side of North Carolina

map of River Pointe RV Park in Morganton, NC
Map courtesy of RV LIFE Trip Wizard

At the base of the Blue Ridge Mountains, about an hour east of Asheville and 75 minutes northwest of Charlotte, Morganton, North Carolina, is surrounded by miles of trails, river access, historic sites, and more.You can spend the day exploring and the evening kicking back around a campfire.

For the Outdoor Enthusiasts 

Lake James in North Carolina
 Lake James

If you’re looking for adventure, you won’t have to go far. The area is home to some of the best hiking and biking trails in North Carolina, including the Fonta Flora State Trail, Catawba River Greenway, Linville Falls, and Table Rock. 

Prefer a challenging summit hike or a jaunt along the river? There’s a trail for every skill level. If you travel with e-bikes, the Greenway and Fonta Flora trails offer smooth, well-maintained routes that are perfect for cruising. 

Water lovers have plenty of options, too. Lake James is ideal for boating, fishing, and paddleboarding, while the Catawba River has easy-access launch points for kayaking and canoeing. 

If you’re up for something different, there’s zip-lining at Beanstalk Zip Lines or even hang gliding with Thermal Valley, where you can take in the landscape from above. 

For the History Buffs and Sightseers 

History runs deep in this region. The Overmountain Victory Trail follows the path of Revolutionary War soldiers, while nearby towns still hold on to their early roots. 

Downtown Morganton, just a short drive away, is a great place to explore. Its walkable main street has historic sites, festivals, and plenty of local flavor. 

For the Food and Drink Lovers 

Speaking of flavor! North Carolina is known for its craft beer and wineries, and the foothills have plenty of both. Breweries and tasting rooms are spread throughout the area, offering everything from small-batch IPAs to smooth local wines. 

Dining options range from classic BBQ joints to farm-to-table spots, so if you’re after something quick or a sit-down meal, you’ve got choices. 

“Downtown Morganton is very nice, there are lots of pubs and restaurants.”

Tsmss | RV LIFE Campgrounds

Whatever brings you to this part of North Carolina—the adventure, the scenery, or just the slower pace—it’s the kind of place that’s easy to enjoy for a weekend or much longer.

A Well-Planned North Carolina RV Park with Everything You Need

Photo courtesy of RV LIFE Campgrounds

After a full day of hiking, paddling, or exploring town, it’s nice to come back to a retreat that’s easy to settle into. River Pointe RV Park keeps things simple, spacious, and convenient—so you can relax and recharge for whatever’s next.

Opened in November 2021, River Pointe is a newer RV park that continues to grow, with future expansion plans already in the works. The park features 42 full-hookup sites, ranging from 50 to 60 feet long, easily accommodating a 45-foot RV with a tow vehicle. Whether you prefer a pull-through or back-in site, there’s plenty of space to maneuver without hassle.

Amenities That Make Life Easier

  • Wi-Fi with Spectrum streaming TV
  • Pet-friendly grounds
  • Full-service bathhouse and laundry facility
  • On-site propane refill station
  • Firewood sales
  • Public dump station
  • RV & trailer storage for those needing long-term parking
  • Cabin rental available 

“We have always enjoyed our stay at River Pointe RV Park! Friendly staff maintain immaculate grounds at the park. Not forgetting to mention the added convenience of the clean bathhouse and laundromat. I believe they constantly strive to provide the best services out of any other RV campground…The peaceful ambient and beautiful stargazing views are the cherry on top! Props to this fine and well established park!”

E. Barrera | Google Reviews

Stay Longer, Save More at This North Carolina RV Park

If you’re planning to spend some time exploring the area, River Pointe RV Park makes it easy to extend your stay. The park offers a Stay 7, Pay 6 deal, giving you one free night with a seven-night reservation.

They also offer a 10% discount for military and law enforcement with valid ID as a way to say thank you to those who serve.

Call (828) 228-6882 to book your stay!

A Great Spot to Park, Unwind, and Explore

“Found a Diamond among the rough… if you are looking for a beautiful, safe, nice park to stay while exploring the area – River Pointe is a must!”

K. Peck | Google Reviews

With its prime location, spacious sites, and growing list of amenities, River Pointe RV Park makes it easy to enjoy this part of North Carolina at your own pace. Whether you’re here to hit the trails, spend time on the water, or simply soak in the laid-back atmosphere, you’ll have everything you need to make the most of your stay.

The post There’s More to North Carolina Than You Think— Here’s Where to Find It appeared first on RV LIFE.

Ultimate RV Spring Cleaning Checklist

Washing an RV is a spring maintenance job

The blossoming of spring has RVers excited about the coming travel and camping season. It’s time to start thinking about getting the RV ready for summer adventures. Spring is a perfect time to do a thorough Spring cleaning. A thorough spring cleaning not only gives your RV a fresh and clean seasonal start. It also offers the opportunity to inspect all the RV systems to ensure the coming camping season will be trouble free.

If all of this seems a little overwhelming, not to worry. The key is to stay organized and spread tasks over a few days. For example, set aside a weekend to do exterior spring cleaning jobs. The next weekend you can focus on the interior. Spring cleaning can be a family event too with older kids gaining skills as they accomplish tasks like applying dressing to tires or dusting RV furniture and cabinets indoors. This easy RV spring cleaning checklist is designed to streamline seasonal tasks to make it easy to keep track of what needs doing.

Exterior RV Spring Cleaning Tasks

Roof

Start by cleaning your RV roof. That way you’ll avoid having to wash the RV side walls twice.

Tools and Supplies
  • Nalgene gloves
  • Rubber Roof Cleaning brush
  • Small brush for cleaning gutters and crevices
  • Hose with spray attachment
  • Mild detergent based cleaner
  • No-sag lap sealant (for around roof edges)
  • Self-leveling sealant (for around rooftop extrusions)
  • 2 caulking guns
  • Mineral spirits
  • Clean rags

**Always use caution going onto the roof of your RV. Wear appropriate footwear and maintain three points of contact at all times when you’re on a ladder.**

Inspect, reseal, and clean roof

  • Inspect roof membrane and seals
    • Look for pinholes or tears in the membrane
    • Look for shrinkage or cracking in roof seals
  • Seal roof before washing
  • Seal any pinholes and/or small tears in the roof membrane
    • Wear protective gloves
    • clean area with mineral spirits
    • Seal with self leveling lap sealant
    • Allow to cure as specified by sealant manufacturer
  • Wash the roof using a soft brush dipped in a mild detergent solution starting at the front and using the hose nozzle to rinse as you go, so that the roof doesn’t become slippery

Clean Gutters

  • Remove any large debris
  • Gently scrub RV gutters with a small crevice brush or old toothbrush dipped in sudsy water and rinse

Clean awning

  • Extend awning
  • Scrub the top of the awning using the soft brush used on the roof and mild detergent
  • Gently scrub any mildew using 10% hydrogen peroxide or vinegar and rinse thoroughly
  • Allow to dry thoroughly before retracting

Exterior Walls

Now it’s time to inspect, reseal and wash your RV sidewalls. At the end, use an RV specific wax to help protect your RV’s glossy exterior.

Tools
  • Gloves
  • Flexible silicone sealant
  • Mineral spirits
  • Caulking gun
  • Clean, soft rags
  • RV wash or Waterless wax kit
  • Soft brush or mop on an extending pole.
  • RV wax
  • Hose and spray nozzle for cleaning

Inspect seals around windows, door, and siding

  • Inspect seals around joints, windows, and doors
    • look for cracking, gaps or sealant shrinkage
  • Reseal with silicone sealant
    • Dampen a rag with mineral spirits and clean area you’re going to seal thoroughly with a soft cloth dampened with mineral spirits.
    • Seal affected areas with a 1/8-inch bead of flexible sealant, working in sections
    • Wipe gloved finger on cloth dampened in mineral spirits and gently smooth the joint.
    • Allow to cure as specified by sealant manufacturer

Wash and wax RV side walls

Washing and waxing the sidewalls of your RV is possibly one of the most satisfying and rewarding jobs when it comes to RV spring cleaning. In order to preserve your RV’s glossy finish, always wash with an RV wash and avoid using dish detergent or car wash products on your RV. Finishing with a UV resistant wax will help preserve and protect your RV’s exterior finish.

Pro-tip: Many RV enthusiasts swear by the Aero Cosmetics Waterless RV Wash and Wax System. It’s a kit that allows you to wash and polish exterior RV sidewalls without the hassle of washing, rinsing, drying and waxing. It can be a real timesaver, especially on a large RV.

Slideout maintenance

  • Dress all slideout seals with foaming RV slide out seal dressing
  • Lubricate slideout mechanism with silicone lubricant. SIlicone doesn’t attract dust and dirt, unlike oil-based lubricants

Basement storage door maintenance

  • Lubricate hinges and locks with silicone based lubricant
  • Dress the rubber seals with silicone based dressing to keep them supple

Lubricate entry steps door locks and hinges

  • Lubricate movable parts of entry steps with a silicone lubricant
  • Lubricate entry door hinges with silicone lubricant
  • Keep locks functioning well by spraying with silicone lubricant

Wash windows

Use glass cleaner and paper towels to make windows sparkle

Inspect and clean up house battery terminals

  • Inspect the terminals on your house batteries for corrosion
  • Clean corrosion with baking soda and a wire brush
  • Apply dielectric grease to terminals to prevent corrosion

Wheels and tires

RV wheels and tires need a little attention, too. Spring is a good time give them a thorough cleaning with sudsy water. Using a UV-resistant tire dressing will help give a well polished look while helping your RV tires to last just a little longer

Spring Cleaning for the RV Interior

De-winterize RV plumbing

  • Drain and flush all RV antifreeze from the RV plumbing system
  • Return bypass valve to original position

Inspect RV cabinet interiors

Inspect for signs of rodents and/or other pests who may have squatted in your RV cabinets over the winter

Vacuum furnace ducts

Vacuum all dust and debris from furnace ducts

Wash or replace air conditioner filters

Sanitize and flush RV freshwater tank

Fill your water tank and add a cup of bleach per 50 gallons of water. Allow to sit 8-12 hours. Drain and thoroughly flush freshwater tank

Basic Cleanup

  • Wash windows
  • Clean and polish cabinet doors
  • Vacuum and wash floors

Final Thoughts About RV Spring Cleaning

Spring cleaning is a great time to inspect your RV so you can take care of little problems before they turn into big problems. Spring cleaning requires doing numerous small jobs, but if you aim to do them systematically over a few weekends, it spring cleaning can be satisfying, with the reward of having a problem-free RV you can be proud of.

The post Ultimate RV Spring Cleaning Checklist appeared first on RV LIFE.

RV LIFE | Grape Creek RV Park

DIY RV Generator Maintenance

We call it “RV generator maintenance,” but what it really boils down to is preventative maintenance. That simple two-word term is so important that it outweighs anything else. Lifespan, reliability, overall performance, safety, costs, and peace of mind all rely on your willingness to indulge in preventative maintenance measures.

Sure, we can change the oil, replace the filters, and run it regularly, but generators are just like everything else, meaning entropy begins its long, downhill process the moment you crank it up for the first time. Your job is to make it last as long as possible, whether that’s for the life of the RV or until you put it up on the marketplace.

By the way, this article applies to built-in RV generators (e.g., Onan models) and portable standalone generators (e.g., Honda, Champion), so no one is left out in the cold (pun intended). It may not be your most excitable RV-routine task, but it is easily one of the most important.

Understanding RV Generators

For RVers, there are (generally speaking) built-in generators and portable ones, but the latter is fairly diverse. These include gasoline, diesel, propane, inverter, solar, and dual-fuel types. There are big battery/fuel backups out there as well, but unless you’re hauling around a mansion, they aren’t included.

The built-in variety is a permanently installed power unit designed specifically for RVs. They are typically mounted in a dedicated compartment or undercarriage space. Built-in generators are convenience models, while portable generators are all about flexibility.

Built-In Generators

Compact, robust, and hardwired into the RV, built-in generators draw fuel directly from the RV’s gas, diesel, or propane tank. This eliminates the need to lug separate fuel cans around. They generally range from 2,500–12,500 watts of power output, depending on the size and capabilities of the rig. Common Onan models spit out roughly 4,000 watts, which is good for mid-size rigs.

Accessibility is sometimes a factor, making RV generator maintenance more difficult at times. There is a huge, often overlooked positive for built-in generators, however—noise reduction. Most hover between 50 and 65 decibels at full load. Built-in generators are designed in sound-dampening enclosures and include mufflers and vibration isolation.

“To fix the problem he says he’ll need to drop the generator out of the RV to get access to all the wiring and check for other damage, and I suspect the work won’t be fast or cheap.”

bikerv1369, iRV2 Forums

They are heavier (100–300 pounds), pricier ($3,000–$8,000), and less flexible than their portable counterparts.

Portable Generators

Portable generators are more difficult to nail down, mostly thanks to an extensive diversity of types, sizes, and uses. For the sake of simplicity, portable generators are compact, standalone power units designed to deliver electricity on the go.

They typically range from 1,000–10,000 watts, weigh 40–120 pounds, and are built for mobility, with wheels, handles, and leverage in mind. Quiet, inverter types hum at 50–60 decibels, while conventional ones are closer to 70–80 decibels.

RV generator maintenance on portable options is usually simpler than with their built-in cousins, but you have to also account for potential theft and fuel efficiency in non-inverter models. Parts are widely available too, as opposed to a more selective market for built-ins.

There are battery generators as well, but their output is generally lower (3,600 watts max/7,200-watt surge). Battery generators, powered with solar panels, are still a great option for small rigs and teardrops, and their maintenance needs are simpler.

Key Differences in Maintenance

Besides the fact that one is built into its own, cozy little nook, and the other necessitates good back posture to haul around camp, there are key differences to consider. One is tied into a motorhome’s fuel system, so its fate is tied to how well you maintain the engine compartment. Look at it on the bright side: it’s essentially a twofer.

Accessibility makes the built-ins more difficult to maintain, as well as the complexity of components. Portable generators are less expensive to maintain and easy to access, but environmental storage conditions are important, as are weather conditions, noise pollution, and fuel requirements.

It comes down to living convenience (quality of life, so to speak) versus maintenance convenience.

Tools and Supplies for DIY RV Generator Maintenance

RV generator maintenance is not always easy, as the above forum comment suggests. But it shouldn’t require a 500-pound tool chest. The right tools, rather than the most tools, are the best tools for maintaining a generator.

“Someone will come up with a nice tool list, but the possibilities are endless. I have known of people who travel with a welder and metal lathe.”

oldmattb, iRV2 Forums

This is all about making sure you don’t have to call a professional out to your RV to drop the generator, spend an hour on it, and charge you enough that you’ll have to sell one of your kidneys on the black market. So, with that interesting picture out of the way, let’s start with the basics.

One of the best tools is not a tool at all, at least not in terms of a strict definition. Routine. Establish one and take the time to write down your basic maintenance necessities by week, month, and year. RV LIFE Maintenance (part of RV LIFE Pro, available on the Apple App Store or Google Play Store) is a great app for this, especially if you need something comprehensive and multi-faceted (the app includes much more than just maintenance routines and reminders).

Basic Toolkit

Your basic RV generator maintenance tool kit is the most extensive and includes exactly what most people think it will include. You’ll need a screwdriver set, wrenches, a good socket set, a multimeter, a few pairs of pliers (maybe some needle nose if access is tight), a few paintbrushes for cleanup, and some rags.

Generator-Specific Tools

This includes generator-specific tools and “your” generator-specific tools. Not all generators are created equal, and some require different components than others. For instance, you may want to stock up on oil, but oil may vary by model. Then you have oil filters, spark plugs, fuel stabilizers, air filters, etc.

If you can, stock up on some of these items, like spark plugs and air filters. If you’re ever out in the boonies, stores are closed, or you’re in the middle of a natural disaster or its aftermath, you’ll have the things you need to keep your generator running smoothly and true to form.

An oil filter wrench may be necessary in some circumstances, depending on your generator. This is pretty rare if you’re using a portable generator, but more common in built-ins. Universal straps or cap wrenches will fit most just fine.

Safety Gear

At 85 decibels and above, exposure equals hearing loss over time. Ear muffs are a good idea, especially if you also work in an industry where you are exposed to loud noises daily. Gloves and safety glasses are a good idea as well. Most people never think they need these things until a good diesel splash in the irises disabuse such notions.

Working in the shipbuilding industry for more than a decade now, I recognize the fact that even the most innocuous things I work near can grievously injure or kill me if I lower my guard and/or fail to wear my safety gear. You just never know, so why not cover all your bases, huh?

Check the Specs

Your generator, whether it’s built-in or portable, will have its own manual or section in the overall manual that you can refer to for valuable information, troubleshooting, and, if need be, warranty information. Before you begin maintenance, check over the manual before you get started.

If you can’t find the manual or if you chucked it with the original packaging, you can access just about any manual on the planet by doing an online search for your generator’s model.

Routine Maintenance Tasks

This is your basic stuff but don’t let the words “routine” and “basic” fool you. This stage of the RV generator maintenance info-article is the most important because it’s the preventative maintenance stage. The more focused and routine you are here, the fewer your headaches will be in the future.

Pre-Use Inspection (Both Types)

A solid once-over on your RV generator ensures it’s ready to fire up reliably, safely, and without any unexpected hiccups—whether you’re prepping for a boondocking adventure or a power outage.

  • Check fuel/oil levels and quality.
  • Look for leaks, oil and fuel, underneath or around the unit. Puddles or stains signal trouble.
  • Check for loose connections or damaged cords, especially if you’ve had a recent problem with rodents.
  • For built-ins, check for nests or signs of pest/rodent activity.
  • Examine the exhaust system (built-ins especially).
  • Be sure to clear out any dust or debris.
  • For electric-start models, check the terminals for corrosion and test with a multimeter (12.6 volts is ready to go).
  • Check the air filter to make sure it’s clean and tap out any dust.

This is mostly basic stuff. Anytime you break the generator out of storage or are firing it up after moving from one place to the next, you should go through this process. As for the potential nests, you’d be surprised how quickly a mouse can set up shop, so don’t discount such things just because it’s only been a few days.

Oil Changes

A generator is its own motor, and therefore it requires an oil change periodically. On average, generators require an oil change every 50–100 hours of use. Of course, that’s not set in stone, so it’s a good idea to break out that manual again if you don’t know or aren’t sure.

Portable generators are generally pretty simple in this regard. However, built-ins may require a bit of finagling, depending on the design. Some will even require you to get down beneath them. Undercarriage access is not the preferred method for most people, so it may be worth considering if you’re looking at an RV for purchase.

Air Filter Maintenance

Air filters always seem to get left out in the cold, whether it’s RV generator maintenance or anything else. It’s so easy to forget about. However, like oil, air filters generally need a change every 50–100 hours of use. You can get away with cleaning them out for a little while, but it’s often better to just change them altogether.

Some RVers change them annually and others go by the 10,000–12,000-mile rule, whether it’s the generator air filter or the engine.

Spark Plug Care and Fuel System Maintenance

You don’t have to change spark plugs like you do air filters and oil, but they do need a careful inspection every 100–200 hours of use, or per year—whichever comes first. Sometimes, especially with built-in models, the spark plug(s) aren’t easy to get to. If your built-in doesn’t tip down or slide out, you may have to get creative with extensions and/or wobbles.

“Depending on the model, especially the 4000, they tip down. Place a floor jack or a scissor jack from your car under the outer edge. There are two bolts that release the generator and let the outer edge drop down. It will give you access to the rear plug.”

-Dutch Star Don, iRV2 Forums

Whether it’s a pain in the rear or not, the inspection/replacement process must go on. Without a functioning spark plug, you don’t have a working generator. Inspect the spark plug for signs of corrosion, fouling, or electrode erosion. If there are signs of any of the above, it’s time to make the change.

Fuel quality is critical for RV generators. Stale fuel or otherwise contaminated fuel is more than enough to clog the carburetor, gum up your fuel lines, or damage the engine. Gasoline, just sitting in the tank unused, will remain viable for 30–60 days before it begins a form of chemical degradation.

  • Always use fresh fuel or stabilize stored gasoline.
  • Use ethanol-free gasoline whenever possible (ethanol attracts moisture and kickstart .”phase separation” and corrosion.
  • Circulate treated fuel for 5–10 minutes and fill the tank before storage.
  • Run a stored generator once per month, for 20–30 minutes.
  • Check and replace filters and lines accordingly.
  • Use only clean, approved fuel containers, and keep the tank cap sealed when not in use.

Altitude and temperature have an impact on performance, so increase your inspections and generator maintenance procedures when in extreme or elevated conditions. You should always have a spare spark plug on hand, just in case.

Troubleshooting Common Issues

RV generator maintenance and troubleshooting issues are difficult to cover, mostly because there are so many tiny things that can go wrong. Fortunately, many of these issues are fairly common and worth mentioning here. Again, a healthy dose of preventative maintenance will avoid the vast majority of generator transgressions against their owners.

So, feel free to indulge, so you don’t end up having a very bad day out in the middle of nowhere or an extreme weather event.

Generator Won’t Start

Start with the basics. It may sound dumb, but checking the fuel level is the first task. We’re all forgetful, so there’s no reason anyone needs to know you’ve been trying to start your generator all morning with an empty fuel tank. Another silly thing that’s worth checking is the on/off switch if your generator is equipped with one. You can have a facepalm moment afterward. The rest are fairly general, so work your way through them one by one.

  • Check the battery (for non-pull-start models) for proper voltage, clean wiring, and terminals.
  • Check your oil level (some generators have a low-oil shutoff sensor.
  • Make sure the fuel cutoff valve (only if applicable) is open.
  • Check over the fuel pump.
  • Check the fuel filter and lines.
  • Check the carburetor (often near the air filter box in portables or behind a shroud/top cover in built-ins) by inspecting the fuel line from tank to carburetor, checking for external gunk, and smelly sludge.
  • Check flow by removing the fuel line at the carburetor and turning on the fuel valve or cranking the starter.
  • Pull the spark plug after failed cranking and check to see if it is wet (wet = flooded carburetor).
  • If everything looks OK, blast the bowl, jets, and passages with aerosol carburetor cleaner, let it sit, then wipe or blow out the residue.
  • If you remove the bowl, carburetor, or other parts, check the gaskets to see if they are degraded in any way.
  • Check the spark plug by grounding the plug against the engine block, pulling the starter, and looking for a blue spark.
  • Check the air filter for cleanliness.
  • Ensure the choke is up if it’s a cold start and down if it’s a warm start.
  • Check for error codes (built-ins) on the control panel and verify the RV’s 12-volt system isn’t tripped.
  • Prime the carburetor with a small squirt of starting fluid or gas directly into the air intake (if it fires briefly and dies, there’s a fuel-delivery issue).

Low Power Output

Just because your generator is working, doesn’t mean you’re getting 110%. Generators have an expected voltage, wattage, or ability to handle loads. When you’re getting a low power output, it generally boils down to engine performance, electrical issues, or overload.

  • Plug in a known, 100-watt device, like a bulb or multimeter-equipped gadget, and look for flickering or dimming.
  • Use a multimeter to measure voltage and ensure it is correct.
  • Listen for sounds of bogging down.
  • If equipped, ensure “Eco-Mode” is off (portables).
  • Check the governor (built-ins). RPM should increase under load.
  • Check the fuel filter, lines (kinks or leaks), and carburetor jets (clean them if they’re gummed up) for optimal fuel flow.
  • Never start a generator with stale fuel.
  • Check alternator brushes, capacitor, voltage regulator, and wiring.
  • For inverter units, look for warning lights indicating the inverter is failing.
  • Run the generator unloaded, steadily increasing the load in known increments, until you’re past midway, looking for voltage drops, sporadic RPM, and the sound of the engine bogging.

Excessive Noise and/or Vibration

This is the simplest of the bunch because it usually boils down to loose components, the positioning of the generator, or the exhaust. Readjust the portable genset and see if the problem persists. For both built-ins and portables, carefully inspect throughout, looking for loose bolts, screws, etc.

“Depending on what surface you’re parked on, the noise from the 4000 can bounce off of the ground. Try throwing a piece of thick carpet or padding under it when running. This can absorb/deaden some of the noise.”

-Dutch Star Don, iRV2 Forums

It’s like hair getting caught in a box fan, waking you up in the middle of the night. It’s usually harmless, but you have to find it before it drives you mad. In this case, the noise may drive your neighbors mad as well. Check your exhaust and try to keep your ear open to subtleties in the background, which will help you zero in on the exact location of the noise.

Seasonal and Long-Term Care

Seasonal and long-term care, in terms of RV generator maintenance, is just as important as all the little things you do to keep up with preventative maintenance.

  • For pre-season prep, be sure to run the generator under load for 30 minutes, check all the systems thoroughly, and ensure the tank is full and the fuel stabilizer is in place.
  • Use covers while in storage, and cover the exhaust for built-ins.
  • Periodically check throughout the length of the storage, for dust, debris, or pests.
  • Run the generator monthly, for 20–30 minutes to prevent carbon build-up.

You don’t have to jump through hoops to maintain your RV generator while it’s in storage, but you at least have to cover the above basics. No matter where you are, always make sure you work in ventilated areas, especially if you’re actively running it or dealing with the fuel.

Always disconnect power/fuel prior to repairs. For built-ins, watch out for hot components. Built-in units often require a college degree in Yoga, with an aptitude for stretching and flexibility. When you have to get in that close, getting burned is a distinct possibility.

Last but not least, always handle portables carefully, especially when transporting them to and from for storage purposes. They’re already fairly exposed, so external damage can easily turn into an internal problem. Cover everything well, cut off the lights, and come back once a month to crank it up for a run.

Conclusion

RV generator maintenance is a must for RVers. You don’t have to love it, but you do have to maintain it. Of course, this doesn’t cover every little thing that can possibly go wrong, but it does hit the basics. DIY skills will save you a ton of time and money. The more you can do on your own, the fewer times you will have to fork over $75+ per hour for someone else to do it.

Be sure to cover the key preventative maintenance steps, whether you’re storing the generator or you’re about to hit the road. You never know when a generator will become a must-have component of your RV—especially in adverse weather or natural disasters. Take good care of your RV generator, and it will return the favor a hundred fold.


The post DIY RV Generator Maintenance appeared first on RV LIFE.

Camp ABQ at High Desert RV Park

If you’re planning to take a trip to the Southwest, chances are good that Albuquerque camping is somewhere on your itinerary! Albuquerque is the most-populous city in New Mexico by a wide margin and it’s easy to see why so many people love it. The weather is warm all year long, it’s surrounded by scenic mountains, and the town is full of history.

It’s also a wonderful destination for RVers. There are some lovely parks within the city’s borders, and the surrounding rural areas are ideal for those who want a bit of distance from the hustle and bustle. Snowbirds flock to this city during the winter, but it’s a great place to visit all year long.

There’s no shortage of options when you’re looking for campgrounds, RV parks, or nature preserves. But one option that stands out from the crowd is High Desert RV Park. This campground has excellent reviews, a wealth of amenities, and a location that gives you the perfect balance of excitement and serenity.

Overview

High Desert RV Park is located at 13000 Frontage Rd SW in Albuquerque. It’s within the borders of the city, but positioned right on the western edge. The park is also right off of the I-40 highway so it can be an excellent pit stop if you’re traveling along this route.

But whether you stay for a single night or an entire season, High Desert RV Park will welcome you with open arms. You can easily get to the main city in just a few minutes or just enjoy the peace and quiet that desert camping can provide.

This is a mid-sized RV park, with 76 sites available. In a place that gets as hot as New Mexico, full hookups are essentially a necessity. You need to ensure that you have plenty of water as well as the power to keep your A/C and fans running.

Fortunately, every site at this park comes with full hookups for water, sewage, and electricity, but the amperage will vary depending on which site you choose. Both 30- and 50-amp sites are available, so just be sure to reserve the one that you need before you arrive.

Rates

Albuquerque camping can get expensive, especially if you visit during snowbird season or when there’s a large festival taking place. But the High Desert RV Park distinguishes itself as a campground that offers a wonderful experience for a fair price.

Guests can stay here for between $45–$50 per night (depending on the amperage of the site). Discounts are available for those who set up camp for a week or longer. Essentially, the longer you stay, the more nights you get for free.

In addition, High Desert RV Park is open all year long. You can even book your site for months at a time, ensuring that you’ll always have a spot in this warm and toasty state. As long as you make preparations in advance, you don’t have to worry about missing your window for camping season here.

To make online reservations or just to learn more about this park, visit the campground website at highdesertrvpark.net

Amenities

Photo courtesy RV LIFE Campgrounds.

An RV park without amenities is just a parking lot! Luckily, High Desert RV Park has plenty of comforts to help guests relax and keep up with their day to day tasks. Here, you can enjoy Albuquerque camping in style. Although it’s not a full-on resort, it’s definitely a step up from most campgrounds you’ll find in the desert!

For starters, all the essentials are covered here. Guests can enjoy access to private bathrooms and showers, making it easy to stay fresh and clean on the hottest days. On-site laundry facilities are also open for use so you don’t need to worry about taking lengthy trips into town just to wash your socks.

There are paved roads throughout the campground, making it easy to navigate and park your rig. All of the sites are also leveled and landscaped with red sand and desert-friendly foliage. You can enjoy a bit of greenery and shade, as well as appreciate the local biodiversity! Statues and sculptures are also scattered across the area for some extra fun.

The sites come with picnic tables for outdoor dining or socializing. Complimentary Wi-Fi also broadcasts over the whole area. So if it gets too hot outside, you can crank up the A/C and kick back with your favorite TV shows and online content.

There are also several shared spaces and amenities that every guest can enjoy. For instance, you could take your dog to the on-site pet area and meet up with your fellow campers. There’s also an activity center with billiard tables where you can test your skills and enjoy some friendly competition.

If you need to service your RV, you can also do that here! There are car vacuum cleaners available if you need to clean out your interior. Propane is also sold on-site to keep your various appliances running smoothly.

Nearby Activities/Attractions

Albuquerque draws people in from all across the country. It has so many attractions, museums, and festivals throughout the year that there’s always something to see. Albuquerque camping in an RV is a great way to experience the city while still maintaining a certain level of comfort and freedom.

Nature lovers will love visiting the ABQ Biopark Zoo, Aquarium, and Botanic Garden. This complex has everything and it’s worth spending a full day here( if not more!) You can also see beautiful sights from the Sandia Park Tramway or visit parks like the Petroglyph National Monument and Tingley Beach.

If you love learning something new, there are also plenty of museums and historic places within the city to visit. Check out the New Mexico Museum of Natural History, the Indian Pueblo Cultural Center, and the National Museum of Nuclear Science & History.

If you want a more free-form adventure, stroll through Old Town Albuquerque, stopping at the various shops and cultural sites along the way. There are also plenty of walking tours, bar crawls, aerial flights, and other ways to explore the city.

And of course, we can’t mention Albuquerque without talking about the famous International Balloon Fiesta! This colorful spectacle generally happens during early October each year and it always draws in huge crowds. Albuquerque camping can be tricky during this time of year, so be sure to secure your spot well in advance.

Finally, this city is a paradise for foodies Of course, south-of-the-border flavors are always on the menu here, but there are dining options for every palette. Some of the most popular restaurant options include:

Reviews

And now it’s time to explore the most important metric for any RV park: the reviews. A scenic location and roster of amenities is all well and good, but it doesn’t mean much unless visitors can report that they had a positive experience.

Fortunately, the High Desert RV Park is the total package, with great reviews and an attractive setup. On RV LIFE Campgrounds, more than 350 people have shared their thoughts and feedback for this park. And this has earned it a cumulative score of 8.6/10! This makes it one of the most highly-regarded destinations for Albuquerque camping.

Guests complimented the size of the RV sites, saying that they didn’t feel cramped during their stay. Many people also said that they enjoyed the location here because it was close to the city of Albuquerque and attractions like the Petroglyph National Monument.

The decorations around the campground were also universally enjoyed. The statues of cowboys, animals, Native Americans, cacti, and various artistic sculptures made this park one in a million.

Be sure to book your spot early so you don’t miss your chance to stay at one of the most popular and beloved RV parks near Albuquerque. If you want to read more firsthand accounts from guests, check out High Desert RV Park’s page on RV LIFE Campgrounds.

Related Articles:

The post Camp ABQ at High Desert RV Park appeared first on RV LIFE.

Don’t Head Into Camping Season Without This RV Training

collage of photos showing girl performing various performance checks on her RV and watching videos on her llaptop as part of lab work for an RV training course

The Online RV Training That Could Save Your Camping Season—and Your Wallet

The course was provided to me for review, but all insights and opinions expressed here are my own.

Camping season is around the corner—and while you’re probably dreaming about lakeside sunsets or boondocking under the stars, your RV might have other plans.

No matter how prepared you think you are, RV life has a funny way of throwing surprises your way. After a decade on the road, we’ve had our share of breakdowns, quirks, and “what the heck is that noise?” moments.

Now, my husband has always had a knack for figuring things out. But somewhere along the line, I realized I was leaning on that way too much. I’d nod along while he explained something about our water heater or electrical system, but truthfully? I wasn’t absorbing a thing.

And that’s a problem—because we both live in this RV. I needed to stop coasting and start understanding the inner workings of our home on wheels, not just for emergencies. That decision led me to the RV Owners Home Study Course PRO, developed by the National RV Training Academy (NRVTA) and distributed by rvtechcourse.com.

I wasn’t looking for quick fixes. I wanted RV training that would give me real understanding and confidence——and maybe even help me impress others with my newfound technical vocabulary. Because here’s the thing: the more you know about your RV, the smoother your adventures unfold—and the less you have to fake knowing what a capacitor does.

Getting to Know the National RV Training Academy (NRVTA)

If you’re going to learn how to take better care of your RV, you might as well learn from the people who do this day in and day out. The National RV Training Academy (NRVTA), located in Athens, Texas, is a Certified Texas Workforce Commission (TWC) Career College. They offer everything from basic training for RV owners to advanced technical programs for folks who want to become certified technicians or inspectors.

What makes NRVTA stand out is their balance of classroom-style instruction and hands-on training—something that really helps the information stick.

RV Fundamentals Training: Course Content

At NRVTA, every student starts with the RV Fundamentals Training. It’s the foundation for everything else they teach—whether you’re just trying to better understand your own rig or thinking about a future in RV tech.

This course covers all the major systems you’ll find in an RV and explains them in a way that makes sense, even if you’re not a naturally technical person. Here’s a quick look at what’s included:

  • Basic RV Electricity – The fundamentals of how electricity works in your RV: voltage, amperage, wattage, and ohms.
  • DC and AC Electrical Systems – How both types of current operate in an RV, including safety practices and how to identify common components.
  • RV Propane Systems – Operating basics, safety checks, and how to detect leaks.
  • RV Water Systems – How to handle fresh, gray, and black water systems, along with winterizing and general maintenance.
  • Climate Control Systems – Troubleshooting and caring for your A/C, furnace, and fridge.
  • Exterior and Mechanical Systems – A look at slideouts, seals, roof components, exterior panels, and even wheel bearings.
  • Hands-On Labs – Step-by-step exercises that let you put your learning into action and actually work on real systems.

The RV Fundamentals Training is offered as a one-week certified course on-site in Texas. But if you’re like me and can’t always drop everything and head to the Big Red School House, there’s a solid alternative…

Online/At-Home RV Training Courses

If you’d rather learn about your RV on your own time and turf, RVTechCourse.com makes that totally doable. They offer two versions of the RV Fundamentals Training in flexible, home-study formats: one fully online, and one that includes a USB drive and printed materials.

Online Home Study Course:

This version gives you access to all the training videos and PDF booklets through RVTechCourse.com’s online student portal. Once you sign up, you’ll get login info so you can start learning right away—anywhere you’ve got internet access.

USB Home Study Course:

Prefer something you can hold in your hands or use offline? This option comes with all the videos on a USB drive and printed materials shipped to your door. You still get access to the online portal, too—so you can choose how and where you learn.

There are also two levels:

Home Study Course: A great intro to essential RV maintenance topics—perfect if you’re just getting started.

Home Study Course PRO: This version includes everything from the Home Study Course, plus hands-on labs that walk you through working on your own rig. It mirrors the in-person RV Fundamentals course and, if purchased at full price, comes with a $300 credit toward attending in person down the line.

Both versions offer the flexibility to learn on your schedule, revisit lessons whenever needed, and avoid the travel-and-lodging expense. Whether you’re watching the videos from your dining table or flipping through the workbook on a rainy day at camp, the course is built to fit real RV life.

My Journey Through the RV Owners Home Study Course PRO

When I started the RV Owners Home Study Course PRO, I didn’t realize just how much I’d been glossing over when it came to truly understanding our RV. While I had a general idea of how things worked, the course quickly showed me how deep the rabbit hole really goes—especially when it came to the electrical system, which turned out to be the most extensive and enlightening part.

Breaking Down Every RV System

The RV training course starts with the basic principles, drilling into electricity at the level of electrons. From there, it builds on that foundation, moving into units of measurement and how they’re manipulated in both DC and AC systems. Each section connects to the next, so by the time you’re digging into more intricate topics like load balancing or fault troubleshooting, you’re not lost—you’ve got the groundwork to follow along.

The RV training home study program walks through every major RV system, explaining how they work, identifying common issues, and guiding you through practical troubleshooting steps.

The best part? I could go at my own pace. If something didn’t click right away, I could pause, replay, or just take a beat to think. And yes—I hit replay a lot. But having that freedom to revisit sections as needed made a big difference in how well I absorbed the material.

A Customizable Learning Experience

I also printed out the PowerPoint presentations, maintenance guides, and troubleshooting handouts, sticking them all in a binder along with my own notes and diagrams. That binder and accompanying videos have since become indispensable, something I pull out anytime something seems off. It’s like having my own RV owner’s manual—but one that actually makes sense.

The hands-on labs were another highlight. Each task was clearly explained and demonstrated in the videos, and then I got to perform it on my RV. It was practical, engaging, and genuinely satisfying to complete a lab and know I’d done it myself.

Todd Henson, the main instructor, was a big part of what made this course so effective. He has this great way of breaking down complex topics, tying them to hilarious stories and real-world scenarios—from Ohm’s Law to propane systems. It felt like he was talking with me, not at me, which made the learning process not only easier but more enjoyable.

The Sights and Sounds of Understanding

From left to right: Checking the voltage of our adapter, tightening screws of the neutral bus bar, priming GasStop connector; testing the “health” of A/C compressor; checking the capacitance of our compressor capacitor

I didn’t rush through the course. I took my time over a couple of months, working through the labs, testing out what I was learning, and really getting to know our RV’s systems in a way I never had before.

  • –>I’ve started paying closer attention to the sequence of sounds when our propane system kicks on: the click of the solenoid opening, the tick-tick-tick of the igniter sparking, and finally, the satisfying boom of combustion as the burner ignites. But the learning didn’t stop there.
  • –>I climbed onto the roof to test the capacitance of our “Herm” capacitor and learned how to check the health of our A/C compressor. 
  • –>After hooking up a freshly filled portable propane tank to our motorhome’s Extend-a-Stay kit, I primed the GasStop attachment and got everything flowing for the first time.
  • –>I also got hands-on with testing polarity at our RV’s shorepower connections and adapters. On top of that, I started paying more attention to how our RV’s circuits are divided within the unit, learning to balance which appliances I run simultaneously to avoid overloading.

What used to feel like random noises, tripped breakers, or mysterious malfunctions now makes sense. I understand what’s happening in those moments—and why. And having that kind of knowledge has given me a level of confidence I didn’t realize I was missing.

A New Dynamic on the Road

What really surprised me was how this online RV training course changed the way I approach nomadic life with my husband. Before, I left most of the troubleshooting to him. I’d chime in here and there, but I wasn’t really contributing much when things went sideways.

Now, I’m jumping in with my own ideas and suggestions, and we’re working through problems together. It’s been such a great bonding experience, something I didn’t expect from learning about RV systems. These days, we’ll sit and debate things like slideout lubrication schedules or appliance maintenance, and it makes me feel like we’ve leveled up as a team.

Why Every RVer Needs This Course

Whether you’re brand new to RV life or have years under your belt, the RV Owners Home Study Course PRO offers something invaluable: knowledge and confidence.

For beginners, it lays a solid foundation—turning all that intimidating jargon into clear, usable knowledge. For seasoned RVers, it fills in the gaps and helps you tackle issues that might’ve otherwise meant a pricey service call or a trip delay. And if you’re getting your rig ready for camping season? This kind of training is one of the smartest ways to prepare—not just your RV, but yourself.

What sets this course apart is its flexibility. You don’t need to commit to attending in person or completing it on a set timeline. Instead, you can learn at your own pace, revisit sections as needed, and adapt the lessons to your specific RV. The PRO version’s hands-on labs take this further by allowing you to practice skills and concepts directly on your vehicle, ensuring what you learn sticks.

By understanding the fundamentals, you’ll be better equipped to troubleshoot common problems, communicate clearly with service professionals, and make informed decisions about your RV’s care. Whether you’re trying to prevent issues or just want to know what’s happening behind the scenes, this course gives you the tools to approach RV ownership with greater ease and independence.

Final Thoughts: Becoming a More Capable RV Owner

RVTechCourse.com’s RV Owners Home Study Course PRO has completely changed the way I approach RV ownership. It gave me a deeper understanding of how our systems work and, more importantly, the confidence to take a more active role in maintaining and troubleshooting them.

Instead of hoping everything works when we fire up the rig, I now feel more prepared to handle what comes our way—and more invested in keeping things running smoothly.

If you’re ready to understand your RV on a deeper level—not just how to use it, but how to take care of it—this course is absolutely worth your time. Whether you’re tired of feeling unsure when something goes wrong, want to stop relying on service techs for every little thing, or just like the idea of becoming more confident and capable on the road, this training gives you the tools to get there.

Camping season is coming. The big question isn’t whether your RV is ready—it’s whether you are.

And while we’re on the subject of empowering RV owners, check out RV Entrepreneur Podcast Episode #380.

In this episode, Brenda Puckett and Dana Hext—both NRVTA graduates and instructors—share how they’re helping more RVers, especially women, gain the skills and confidence to understand and operate their RVs through hands-on, approachable training.

Their journey is inspiring, and their mission aligns so well with what this course offers: real knowledge, real confidence, and the freedom to take charge of your RV.

🎧 Give it a listen here: Empowering Women in RV Tech – RVE 380

The post Don’t Head Into Camping Season Without This RV Training appeared first on RV LIFE.

RV A/C Maintenance for Spring

Performing RV A/C maintenance in the springtime is a smart move for several practical reasons, including swamp, er, well, you know where that’s going. You’re gearing up for warmer weather and the most popular time for RVs to hit the road. After months of storage, your A/C unit probably collected some dust, debris, potential pest intrusions, and more.

Besides, spring temperatures are pretty mild, making it an ideal time to test and troubleshoot your system without the urgency of summer heat bearing down on you. You can take your time checking over filters, coils, and other components while weeding out that weird squeaky noise that was bothering you the year prior.

A/C maintenance is also a money-saver. Addressing small problems now, such as weak seals or low refrigerant, will avoid more expensive repairs in the future or a catastrophic failure while you’re boondocking in Alamogordo, New Mexico, in the middle of July. No thanks!

Understanding RV Air Conditioners

Knowledge is power, as the saying goes, and it’s a good idea to know your RV A/C, whether you’re doing maintenance in the spring or in the middle of summer time. The most common RV rooftop unit is a 13,500-Btu A/C with compactly integrated components. Do yourself a favor and get to know each so you can take that thing apart and reassemble it in your sleep.

  • Compressor: The compressor is the beating heart of the system, pressurizing the refrigerant gas in preparation for a cooling cycle.
  • Condensor Coil: Refrigerant leaves the compressor, passes into the condenser coil, and releases heat as it converts from gas to liquid.
  • Evaporator Coil: Liquid refrigerant passes into the evaporator coil, expands back into a gas, and absorbs heat from the RV’s interior.
  • Fans (Blower): Most RV A/C units have two—one to push hot air over the condenser and one to distribute cool air inside.
  • Refrigerant: An R-410A or R-134a chemical that cycles through the system, changing states and absorbing heat.
  • Air Filters: Removable screens that capture dust, dirt, and debris, filtering it from the system.
  • Thermostat: A control unit that’s either built into the system or wall-mounted. It communicates with the system, turning it off or on according to the interior temperature.
  • Capacitors and Electrical Components: Start and run capacitors help the compressor and fan motors kick on and operate smoothly.
  • Housing and Shroud: The exterior cover that protects components from weather, UV rays, and debris. Interior ducts or vents direct airflow efficiently.

And that about wraps it up—all the typical components in a common RV A/C system. Preventative maintenance in the spring demands a degree of familiarity with these components. In other words, if you don’t know what you’re looking at, you probably shouldn’t take it apart. Just a thought.

Tools and Supplies for RV A/C Maintenance in the Spring

Inevitably, you’re going to come across dust, dirt, and debris, so a good paintbrush and a vacuum cleaner (Shop-Vac is recommended) are necessities. Pack a multimeter for the ride as well. You’ll need it to test your capacitors, wiring, or thermostat for continuity and voltage. You don’t want to do all of that with your fingers. 

Make sure you have a quality socket/wrench set and plenty of screwdrivers. Don’t skimp on this one and grab a cheap set from Wally World. Anyone indulging in a craft of any kind is only as good as their tools. A solid socket set will be useful to your great-grandchildren, assuming we all survive the zombie apocalypse. 

“Get a kit with real set of 1/4–3/8 sockets and ratchets maybe just the larger 1/2 sockets, like. 5/8, 11/16-ish and up. Some kits are stretched by using adapters but the extra length can be too much. Get a multi screw driver or two. A decent set of butt connectors crimper strippers or kit. Multi meter. Couple crescent wrenches and a 12v test light.”

-153stars, iRV2 Forums

Gloves, safety glasses, flashlights, and/or headlamps go without saying. You can’t haul an RV around if you’re blind from debris or cleaning spray from cleaning your A/C. Light machine oil is a good lubricant of choice. It works well for oiling the fan motor bearings and other moving parts.

Invest in a fin comb for straightening out those bent condenser or evaporator fins. It’s very convenient. A reusable, washable cleaning rag or cloth is useful for wiping down surfaces and for cleaning up excess lubricant or cleaning solution. 

Optional but Helpful

The better prepared you are for RV A/C maintenance come springtime, the smoother this task will go. A commercial solution coil cleaner is a safe bet, as well as a tape measure and leak-detector spray. 

The tape measure is good for double-checking your filter sizes before you jump online or head over to the store and purchase the wrong one. Refrigerant leaks are a concern as well, and a leak detector spray will help spot these leaks. However, recharging often requires a professional. 

An Amp Clamp is useful for measuring the current draw of the compressor—helpful in diagnosing refrigerant leaks. 

Step-by-Step Spring Maintenance Guide

At last, we arrive at the fun part—doing the work. Somebody’s gotta do it, right? Things might get a little complicated, especially if this is your first go-round, but the process itself is fairly straightforward. Before you haul yourself to the top of your RV, make sure you turn off all power to the RV (generators, batteries, shore power, etc).

1. Inspect the Unit

Remove the exterior shroud (usually requires a Phillip’s head screwdriver) and inspect for obvious, visible damage. Also, look for debris, dirt, or pest damage that may affect the A/C unit’s performance. Look for nests and inspect any visible wiring for chew marks or corrosion. 

RV maintenance in the spring is the best time for discovering bent fins, dented or cracked housing, and other deformities or damages the air conditioner unit may have endured since the last time you checked. 

2. Clean the Filters and Coils

Pull the air filter(s) out (typically located behind the interior vent or grill—check your manual). If it’s still in good shape and reusable, wash it with warm water and mild soap. If it needs replacing, do so. Bust out the Shop-Vac and clean any debris from the evaporator and condensor coils while you’re at it. 

“I use a shop vac with the small brush attachment to vacuum out condenser coil, be careful not to bend the fins on the condenser coil, if you do take a razor knife or small flat head screwdriver and straighten them back out, a small toothbrush helps to clean with to.”

-cardwellmarty, Forest River Forums

Once you’re done vacuuming, spray some foaming coil cleaner on both coils and let it sit there for 5 minutes (10 minutes, max). Rinse with warm water, but be careful to avoid getting water on sensitive components. Check the fins carefully and straighten them with your fin comb if necessary. 

3. Test Electrical Components

Before you get started, check the wiring, connectors, and any visible electrical components for fraying, corrosion, or loose connections. Check your manual for exact specs (typically 110-120V AC) and ensure the RV has power so you can accurately test everything. 

Before you start on the A/C, set the multimeter to AC and measure the voltage at the campground pedestal just to make sure you are getting the proper power supply. 

Check the compressor and the fan capacitors for proper voltage. Test the thermostat by setting it to cool. It’s also a good idea to listen carefully to the compressor and fans as they kick on. You want to make sure that they are indeed kicking on and not making any unfamiliar noises. 

Exceptions to the Above

Most rooftop RV A/C units, like Dometic or Coleman models, run on 110-120V AC power from shore, generators, or an inverter converting DC to AC. However, smaller rigs with portable A/C units and other exceptions may use 12V DC thermostats. 

Just be sure to set your multimeter accordingly after going over your manual for the A/C unit and thermostat. 

4. Check Refrigerant Levels

As a part of your RV A/C maintenance checking refrigerant levels in the spring or any time of the year is a bit of a misnomer. These are sealed systems, unlike a car’s A/C with a sight glass or other indicators. There’s really no “user-friendly” method for checking the level. 

What you’re mostly looking for is signs of low refrigerant or signs of leaks. It’s a system of assumption, and we all know what they say about assumptions. However, you have to work with the system you’re given. Professionals typically use a manifold gauge set or a temperature differential check.

As for the rest of us non-pros, look for frost or ice on the evaporator, visible through the interior vent. Oily residue around lines or coils is a sign of a slow leak as well. Last but not least, the test cycle, covered more in-depth below, will speak volumes in this regard. 

5. Lubricate Moving Parts

If you don’t already know what to look for, check your manuals to locate the fan motor bearings or other moving parts that require periodic lubrication. Not all RV units require this, so it may be necessary to ask a professional just to be certain one way or the other. 

“I’m going to look for the oil tubes but a little 3 in 1 oil on each end of the shaft should help prevent it again. I think I will do the coils when I return.”

-jamesp-FRF, Forest River Forums

A few drops of light machine oil (3-in-1 oil or something similar) on accessible bearings is plenty. Wipe off any excess, and that’s all there is to this one. 

6. Run a Test Cycle

Reassemble your unit unless you want to find out what an A/C unit does when partially disassembled and coursing with power. Make sure the shroud is back on and the screws are in place.  Set the thermostat to a cool setting, something like 70°F. If it’s cool outside, the interior is usually warmer. If you have to, place it on the lowest cool setting. 

Let the A/C run for about 20 minutes. Listen to it, get a feel for it, and check your vents to ensure you’re getting plenty of air and that the air is cool. Listen for unusual noises (grinding, squeaking, rattling, etc). The air from the vents should be 10-20°F cooler than room temperature. 

Benefits of Regular Maintenance

First and foremost, the primary benefit is a functioning A/C unit that will keep the interior of the RV cool when you can fry an egg on the sidewalk outside. However, it’s not enough to keep things cool. You want the A/C to provide the maximum benefit with the best efficiency. 

Lower energy draw means less drain on your RV’s battery, generator fuel, or shore power. For instance, something as simple as dirty air filters can bump your energy use northward by 10% to 20%. That’s a simple solution and a measurable benefit. 

Performing routine RV A/C maintenance every spring will extend the lifespan of the unit by maintaining lubrication for the moving parts, fixing small leaks, and preventing overwork. With routine care and preventative maintenance, the average RV A/C unit should last a decade or more. 

Maintenance also means fewer costly repairs in the short and long term. Think about it like this: a $50 service call or maintenance fix versus a $500 compressor swap. Most people will jump on the former and avoid the latter like the plague. 

Consistent comfort and healthier air quality are secondary benefits, but no less important to RVers. If you have allergies or suffer from seasonal allergies, it’s more than “secondary.” In short, regular maintenance keeps your A/C efficient, durable, and dependable in exchange for only a few hours of labor a year. 

Who can argue with that?

Conclusion

RV maintenance in the spring may not be the most exciting part of your year, but it beats a blowout while draining your black tank. It definitely beats a busted A/C while visiting Key West in August. Believe it or not, there are places on your body that you never thought could sweat until you hit up the Florida Keys with no A/C. 

Start early in the springtime, knock it out, and get it done with. After that, it’s a matter of an occasional inspection and keeping your filters clean and replaced as needed. RVers should think of preventative maintenance as a law. It’s easy to get aggravated by the effort sometimes, sure. 

However, think about all of the problems you never know about and will never experience because of what you’re doing right now. Take care of your RV, and it will take care of you. Be sure to add any hints, tips, or advice from your own experiences as an RVer in the comments below. Stay safe!

The post RV A/C Maintenance for Spring appeared first on RV LIFE.

There’s More to North Carolina Than You Think— Here’s Where to Find It

Sponsored by River Pointe RV Park
RV park set behind a group of trees
Photo courtesy of RV LIFE Campgrounds

This North Carolina RV Park Sits in the Perfect Spot for Adventure and Small-Town Charm

Ask most people about RVing in North Carolina, and they’ll probably bring up the Outer Banks or the Blue Ridge Parkway. But sandwiched between those well-traveled routes is a stretch of foothills where the rivers are just as inviting, the trails just as scenic, and the crowds a whole lot thinner. 

This is where Lake James spreads out against a backdrop of rolling mountains. Where hikes take you to places with breathtaking, panoramic views. And where communities still have that easygoing, small-town feel—the kind of place where everyone knows your name. 

And if you’re looking for a North Carolina RV park that puts you right in the middle of it all, River Pointe RV Park in Morganton makes a solid home base.

“This was our 4th stay here, very convenient on our various travels. One night stay on our way out west. Very nice campground, well maintained. Close to I40.”

Icecube | RV LIFE Campgrounds

Experience This Side of North Carolina

map of River Pointe RV Park in Morganton, NC
Map courtesy of RV LIFE Trip Wizard

At the base of the Blue Ridge Mountains, about an hour east of Asheville and 75 minutes northwest of Charlotte, Morganton, North Carolina, is surrounded by miles of trails, river access, historic sites, and more.You can spend the day exploring and the evening kicking back around a campfire.

For the Outdoor Enthusiasts 

Lake James in North Carolina
 Lake James

If you’re looking for adventure, you won’t have to go far. The area is home to some of the best hiking and biking trails in North Carolina, including the Fonta Flora State Trail, Catawba River Greenway, Linville Falls, and Table Rock. 

Prefer a challenging summit hike or a jaunt along the river? There’s a trail for every skill level. If you travel with e-bikes, the Greenway and Fonta Flora trails offer smooth, well-maintained routes that are perfect for cruising. 

Water lovers have plenty of options, too. Lake James is ideal for boating, fishing, and paddleboarding, while the Catawba River has easy-access launch points for kayaking and canoeing. 

If you’re up for something different, there’s zip-lining at Beanstalk Zip Lines or even hang gliding with Thermal Valley, where you can take in the landscape from above. 

For the History Buffs and Sightseers 

History runs deep in this region. The Overmountain Victory Trail follows the path of Revolutionary War soldiers, while nearby towns still hold on to their early roots. 

Downtown Morganton, just a short drive away, is a great place to explore. Its walkable main street has historic sites, festivals, and plenty of local flavor. 

For the Food and Drink Lovers 

Speaking of flavor! North Carolina is known for its craft beer and wineries, and the foothills have plenty of both. Breweries and tasting rooms are spread throughout the area, offering everything from small-batch IPAs to smooth local wines. 

Dining options range from classic BBQ joints to farm-to-table spots, so if you’re after something quick or a sit-down meal, you’ve got choices. 

“Downtown Morganton is very nice, there are lots of pubs and restaurants.”

Tsmss | RV LIFE Campgrounds

Whatever brings you to this part of North Carolina—the adventure, the scenery, or just the slower pace—it’s the kind of place that’s easy to enjoy for a weekend or much longer.

A Well-Planned North Carolina RV Park with Everything You Need

Photo courtesy of RV LIFE Campgrounds

After a full day of hiking, paddling, or exploring town, it’s nice to come back to a retreat that’s easy to settle into. River Pointe RV Park keeps things simple, spacious, and convenient—so you can relax and recharge for whatever’s next.

Opened in November 2021, River Pointe is a newer RV park that continues to grow, with future expansion plans already in the works. The park features 42 full-hookup sites, ranging from 50 to 60 feet long, easily accommodating a 45-foot RV with a tow vehicle. Whether you prefer a pull-through or back-in site, there’s plenty of space to maneuver without hassle.

Amenities That Make Life Easier

  • Wi-Fi with Spectrum streaming TV
  • Pet-friendly grounds
  • Full-service bathhouse and laundry facility
  • On-site propane refill station
  • Firewood sales
  • Public dump station
  • RV & trailer storage for those needing long-term parking
  • Cabin rental available 

“We have always enjoyed our stay at River Pointe RV Park! Friendly staff maintain immaculate grounds at the park. Not forgetting to mention the added convenience of the clean bathhouse and laundromat. I believe they constantly strive to provide the best services out of any other RV campground…The peaceful ambient and beautiful stargazing views are the cherry on top! Props to this fine and well established park!”

E. Barrera | Google Reviews

Stay Longer, Save More at This North Carolina RV Park

If you’re planning to spend some time exploring the area, River Pointe RV Park makes it easy to extend your stay. The park offers a Stay 7, Pay 6 deal, giving you one free night with a seven-night reservation.

They also offer a 10% discount for military and law enforcement with valid ID as a way to say thank you to those who serve.

Call (828) 228-6882 to book your stay!

A Great Spot to Park, Unwind, and Explore

“Found a Diamond among the rough… if you are looking for a beautiful, safe, nice park to stay while exploring the area – River Pointe is a must!”

K. Peck | Google Reviews

With its prime location, spacious sites, and growing list of amenities, River Pointe RV Park makes it easy to enjoy this part of North Carolina at your own pace. Whether you’re here to hit the trails, spend time on the water, or simply soak in the laid-back atmosphere, you’ll have everything you need to make the most of your stay.

The post There’s More to North Carolina Than You Think— Here’s Where to Find It appeared first on RV LIFE.

Ultimate RV Spring Cleaning Checklist

Washing an RV is a spring maintenance job

The blossoming of spring has RVers excited about the coming travel and camping season. It’s time to start thinking about getting the RV ready for summer adventures. Spring is a perfect time to do a thorough Spring cleaning. A thorough spring cleaning not only gives your RV a fresh and clean seasonal start. It also offers the opportunity to inspect all the RV systems to ensure the coming camping season will be trouble free.

If all of this seems a little overwhelming, not to worry. The key is to stay organized and spread tasks over a few days. For example, set aside a weekend to do exterior spring cleaning jobs. The next weekend you can focus on the interior. Spring cleaning can be a family event too with older kids gaining skills as they accomplish tasks like applying dressing to tires or dusting RV furniture and cabinets indoors. This easy RV spring cleaning checklist is designed to streamline seasonal tasks to make it easy to keep track of what needs doing.

Exterior RV Spring Cleaning Tasks

Roof

Start by cleaning your RV roof. That way you’ll avoid having to wash the RV side walls twice.

Tools and Supplies
  • Nalgene gloves
  • Rubber Roof Cleaning brush
  • Small brush for cleaning gutters and crevices
  • Hose with spray attachment
  • Mild detergent based cleaner
  • No-sag lap sealant (for around roof edges)
  • Self-leveling sealant (for around rooftop extrusions)
  • 2 caulking guns
  • Mineral spirits
  • Clean rags

**Always use caution going onto the roof of your RV. Wear appropriate footwear and maintain three points of contact at all times when you’re on a ladder.**

Inspect, reseal, and clean roof

  • Inspect roof membrane and seals
    • Look for pinholes or tears in the membrane
    • Look for shrinkage or cracking in roof seals
  • Seal roof before washing
  • Seal any pinholes and/or small tears in the roof membrane
    • Wear protective gloves
    • clean area with mineral spirits
    • Seal with self leveling lap sealant
    • Allow to cure as specified by sealant manufacturer
  • Wash the roof using a soft brush dipped in a mild detergent solution starting at the front and using the hose nozzle to rinse as you go, so that the roof doesn’t become slippery

Clean Gutters

  • Remove any large debris
  • Gently scrub RV gutters with a small crevice brush or old toothbrush dipped in sudsy water and rinse

Clean awning

  • Extend awning
  • Scrub the top of the awning using the soft brush used on the roof and mild detergent
  • Gently scrub any mildew using 10% hydrogen peroxide or vinegar and rinse thoroughly
  • Allow to dry thoroughly before retracting

Exterior Walls

Now it’s time to inspect, reseal and wash your RV sidewalls. At the end, use an RV specific wax to help protect your RV’s glossy exterior.

Tools
  • Gloves
  • Flexible silicone sealant
  • Mineral spirits
  • Caulking gun
  • Clean, soft rags
  • RV wash or Waterless wax kit
  • Soft brush or mop on an extending pole.
  • RV wax
  • Hose and spray nozzle for cleaning

Inspect seals around windows, door, and siding

  • Inspect seals around joints, windows, and doors
    • look for cracking, gaps or sealant shrinkage
  • Reseal with silicone sealant
    • Dampen a rag with mineral spirits and clean area you’re going to seal thoroughly with a soft cloth dampened with mineral spirits.
    • Seal affected areas with a 1/8-inch bead of flexible sealant, working in sections
    • Wipe gloved finger on cloth dampened in mineral spirits and gently smooth the joint.
    • Allow to cure as specified by sealant manufacturer

Wash and wax RV side walls

Washing and waxing the sidewalls of your RV is possibly one of the most satisfying and rewarding jobs when it comes to RV spring cleaning. In order to preserve your RV’s glossy finish, always wash with an RV wash and avoid using dish detergent or car wash products on your RV. Finishing with a UV resistant wax will help preserve and protect your RV’s exterior finish.

Pro-tip: Many RV enthusiasts swear by the Aero Cosmetics Waterless RV Wash and Wax System. It’s a kit that allows you to wash and polish exterior RV sidewalls without the hassle of washing, rinsing, drying and waxing. It can be a real timesaver, especially on a large RV.

Slideout maintenance

  • Dress all slideout seals with foaming RV slide out seal dressing
  • Lubricate slideout mechanism with silicone lubricant. SIlicone doesn’t attract dust and dirt, unlike oil-based lubricants

Basement storage door maintenance

  • Lubricate hinges and locks with silicone based lubricant
  • Dress the rubber seals with silicone based dressing to keep them supple

Lubricate entry steps door locks and hinges

  • Lubricate movable parts of entry steps with a silicone lubricant
  • Lubricate entry door hinges with silicone lubricant
  • Keep locks functioning well by spraying with silicone lubricant

Wash windows

Use glass cleaner and paper towels to make windows sparkle

Inspect and clean up house battery terminals

  • Inspect the terminals on your house batteries for corrosion
  • Clean corrosion with baking soda and a wire brush
  • Apply dielectric grease to terminals to prevent corrosion

Wheels and tires

RV wheels and tires need a little attention, too. Spring is a good time give them a thorough cleaning with sudsy water. Using a UV-resistant tire dressing will help give a well polished look while helping your RV tires to last just a little longer

Spring Cleaning for the RV Interior

De-winterize RV plumbing

  • Drain and flush all RV antifreeze from the RV plumbing system
  • Return bypass valve to original position

Inspect RV cabinet interiors

Inspect for signs of rodents and/or other pests who may have squatted in your RV cabinets over the winter

Vacuum furnace ducts

Vacuum all dust and debris from furnace ducts

Wash or replace air conditioner filters

Sanitize and flush RV freshwater tank

Fill your water tank and add a cup of bleach per 50 gallons of water. Allow to sit 8-12 hours. Drain and thoroughly flush freshwater tank

Basic Cleanup

  • Wash windows
  • Clean and polish cabinet doors
  • Vacuum and wash floors

Final Thoughts About RV Spring Cleaning

Spring cleaning is a great time to inspect your RV so you can take care of little problems before they turn into big problems. Spring cleaning requires doing numerous small jobs, but if you aim to do them systematically over a few weekends, it spring cleaning can be satisfying, with the reward of having a problem-free RV you can be proud of.

The post Ultimate RV Spring Cleaning Checklist appeared first on RV LIFE.

RV Lifestyle | Grape Creek RV Park San Angelo TX

There was a problem loading this feed.